Installation Manual V-9.0.0
Overview
true-Advice enables UBS customers to automatically convert data from and to SWIFT messages. It relies on true-Broker to establish secure communication with UBS.
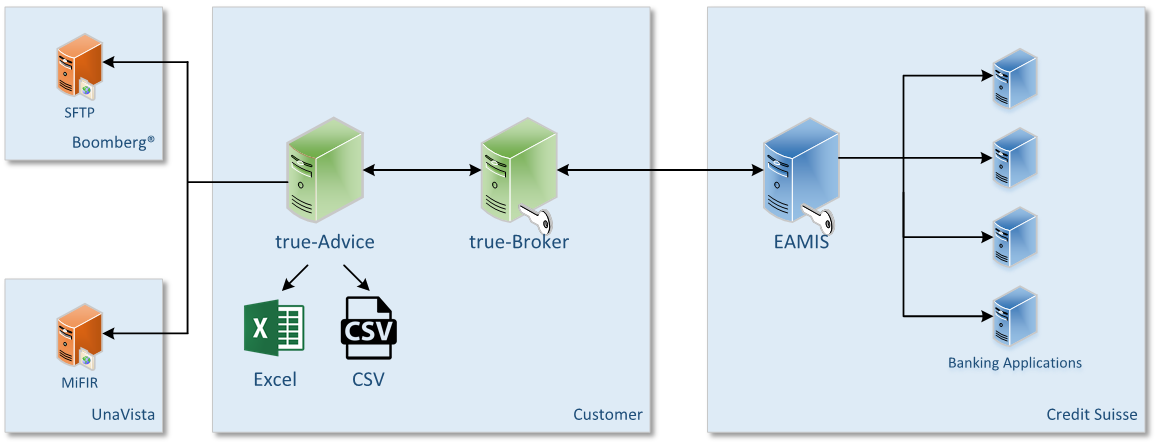
true-Advice Web is a web application running on an Apache Tomcat server.
true-Advice Web is multi-client capable. true-Advice Web Administration is used to manage the client instances of true-Advice Web. For each client a specific true-Advice Web application instance is deployed on Apache Tomcat which separates it from the other clients.
The configuration of each true-Advice Web client instance is held in an internal database.
A separate license is needed for each client. The different true-Advice Web modules are deployed based on the purchased license.
System Requirements
Operating systems
- Microsoft Windows Server 2016 x64
- Microsoft Windows Server 2022 x64
- Microsoft Windows 10 x64
- Microsoft Windows 11 x64
Software
- true-Advice Web
- true-Broker Web
Hardware
- 20 GB free hard disk
- 4 GB RAM
Other
- Administrator rights
- Unbound local port 8650
- Firewall allowing connections to http://localhost:8650
Installing true-Advice Web
The true-Advice Web installation is based on Windows Installer Packages. Please navigate to the TrueAdviceReporting.msi.

Double-click the TrueAdviceReporting.msi to start the installation process.
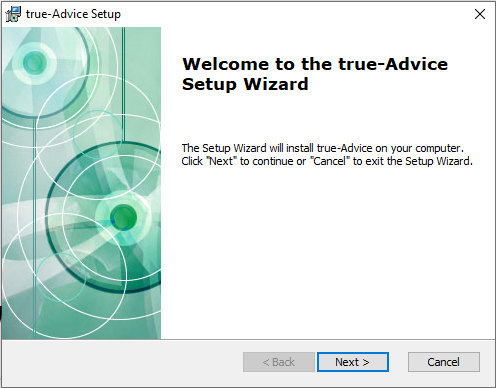
Press Next to continue or Cancel to abort the installation process.
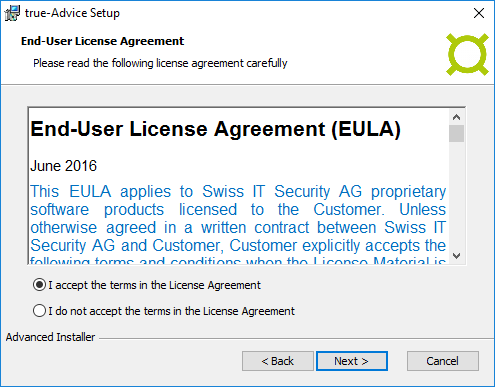
Please accept the End-User License Agreement. Press Next to continue.
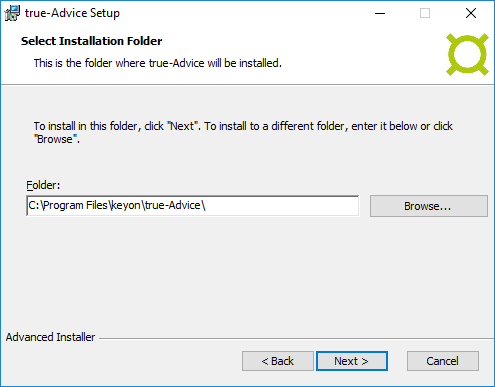
Please select the folder where to install true-Advice Web. Press Next to continue.
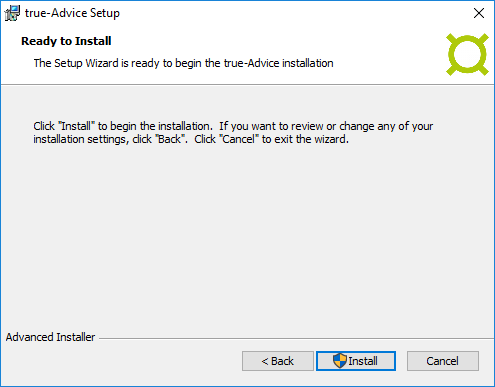
Click Install to start the installation.
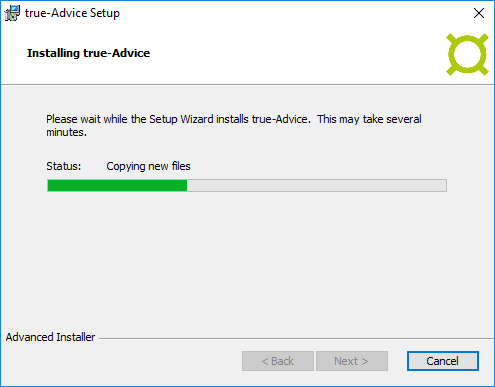
The installation process copies the necessary files to the previously defined installation directory, installs Apache Tomcat as a Windows Service and starts it.
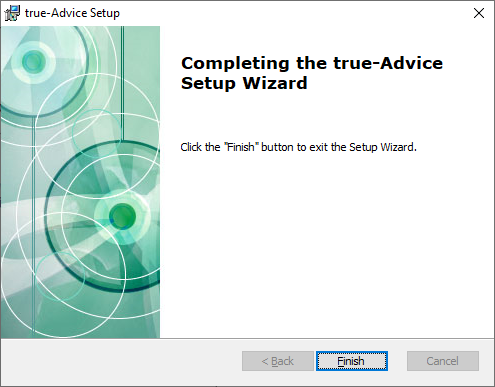
Press Finish to end the installation process. True-Advice Web is now installed and ready to be used.
Updating true-Advice Web
Using Check for Updates
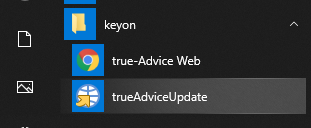
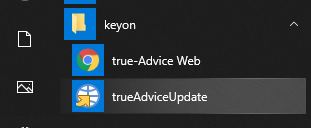
Use the trueAdviceUpdate menu item in the keyon → true-Advice Web menu to start the update process.
The update process checks online whether updates are available. The update process uses the Internet Explorer connection settings to establish a connection to the update page using http. The update page is located on http://www.keyon.ch.
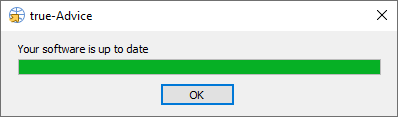
If your true-Advice Web Installation is up to date the following message window is displayed.
If an update is available, the following window is displayed.
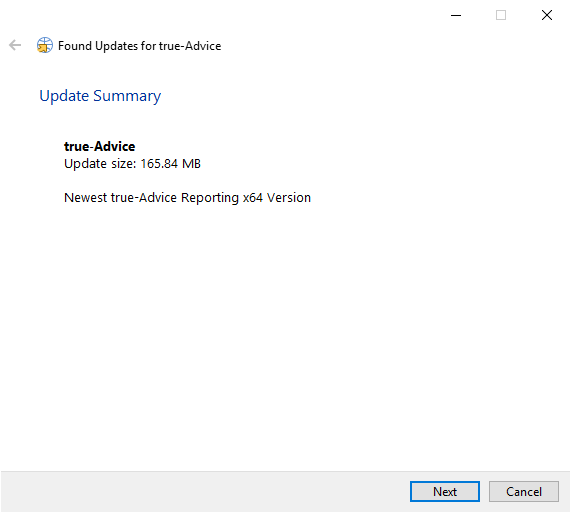
Press Next to start the update process.
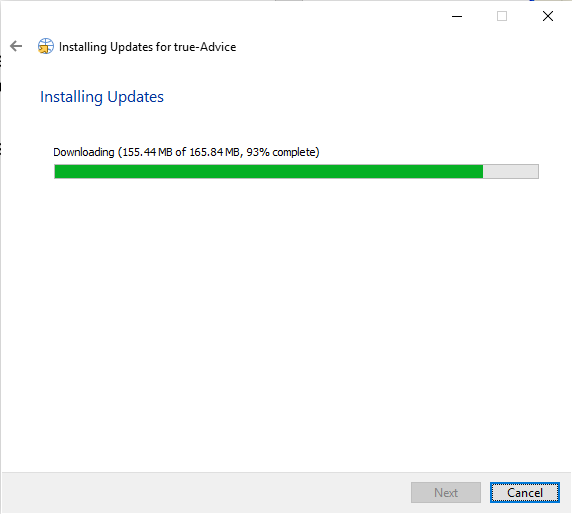
The update process downloads the patch.
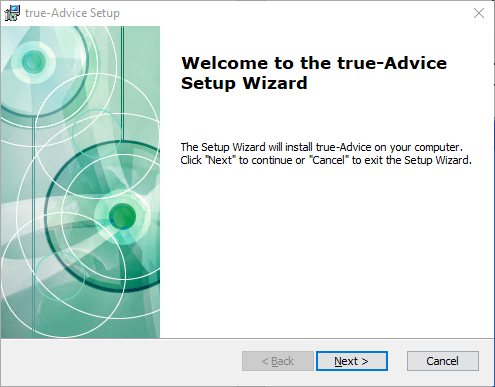
Press Next to start the patch installation process.
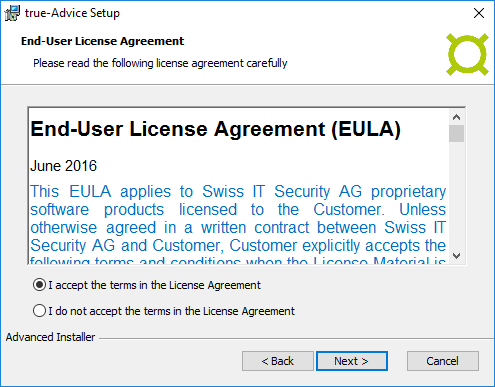
Please accept the End-User License Agreement. Press Next to continue.
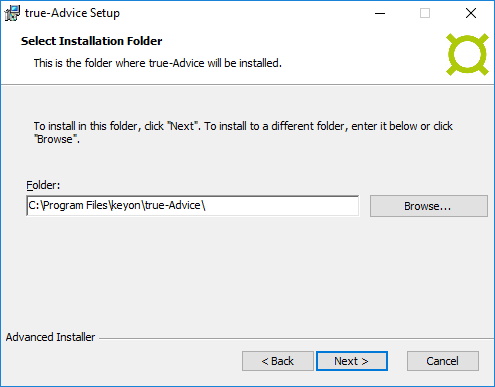
Please select the folder where to install true-Advice Web. Press Next to continue.
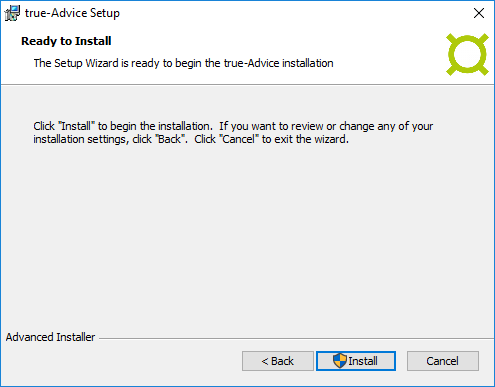
Press Install to begin the installation.
| The database holding the true-Advice Web configuration will not be changed during the patch installation process. |
|---|
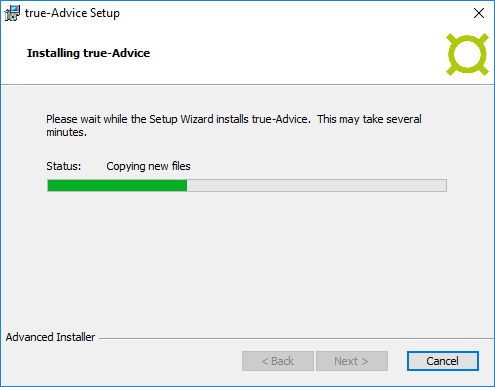
During the patch installation process the Apache Tomcat Windows service is stopped and the new files are copied to the installation directory.
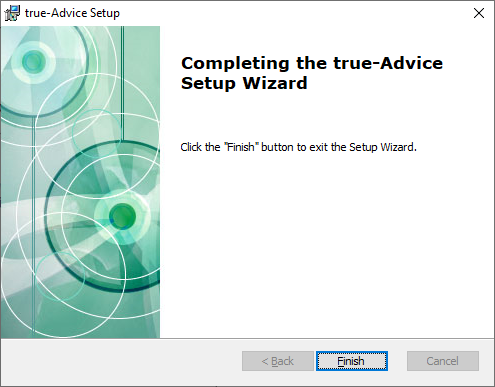
Press Finish to terminate the patch installation process. At the end of the patch installation process the Apache Tomcat Windows service is restarted.
true-Advice Web Windows service
The installation process tries to install true-Advice Web as a Windows service. The Windows service is named TrueAdvice. If true-Advice Web has been installed as a Windows service, you can use the Microsoft Services Console to administrate the service.
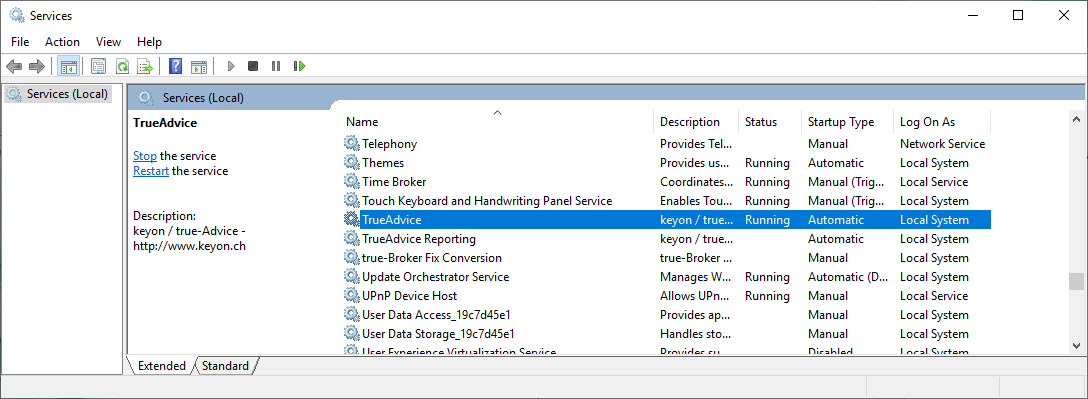
To install true-Advice Web as a Windows service Administrator rights are needed.
Configure true-Advice Web Windows service
Before changing the true-Advice Web Windows service configuration stop the service using the Microsoft Services Console.
To change the true-Advice Web Windows service configuration open the file:
C:\Program Files\keyon\true-Advice\trueAdvice.ini
On an operating system with UAC enabled run the editor as administrator.

\[Class Path\]

Class Path=C:\\Program Files\\keyon\\true-Advice\\server\\\*.jar;C:\\Program Files\\keyon\\true-Advice\\server\\bin\\\*.jar;C:\\Program Files\\keyon\\true-Advice\\server\\lib\\\*.jar;

\[Product Information\]

Upgrade Code={85B1295E-C0E8-403D-BDB4-008407F42D43}

Product Code={1DCD482F-F8A0-4D00-839B-23E91CA5B2DA}

Product Name=true-Advice

\[Application\]

Application Type=service

\[Java Runtime Environment\]

JRE Path=C:\\Program Files\\keyon\\true-Advice\\jre64\\

JVM Source=favor\_JDK

JVM Type=favor\_server

Library Path=C:\\Program Files\\keyon\\true-Advice\\server\\bin\\;

Main Class=ch.keyon.advancedinstaller.service.tomcat.AdvancedInstallerWin32ServiceTomcat

Maximum Version=1.7

Minimum Version=1.7

Virtual Machine Parameters=-Xms128M -Xmx3062M -Dderby.system.home="C:\\ProgramData\\keyon\\true-Advice\\db" -DtrueadviceReporting.data.home="C:\\ProgramData\\keyon\\true-Advice" -Dlogback.configurationFile="C:\\ProgramData\\keyon\\true-Advice\\cfg\\logback.xml" -Dcatalina.base="C:\\Program Files\\keyon\\true-Advice\\\\server" -Dcatalina.home="C:\\Program Files\\keyon\\true-Advice\\\\server" -Djava.endorsed.dirs="C:\\Program Files\\keyon\\true-Advice\\\\server\\endorsed"
Use the Microsoft Services Console to start the true-Advice Web Windows service.
| Do not change these settings unless you are advised by SITS support to do so. |
|---|
Starting true-Advice Web Windows service
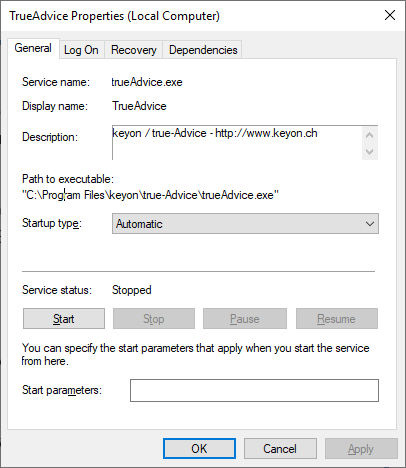
Start the true-Advice Web Windows service using the Microsoft Services Console.
Stopping true-Advice Web Windows service
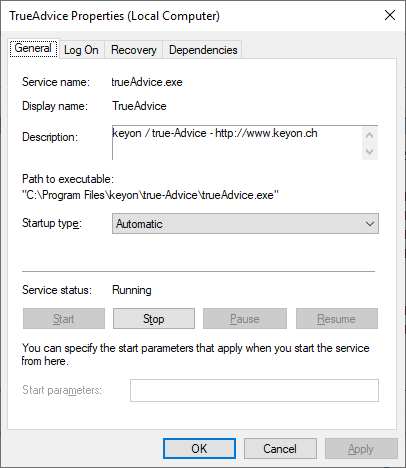
Stop the true-Advice Web Windows service using the Microsoft Services Console.
Daily restart of Apache Tomcat Windows service
The Apache Tomcat Windows service is scheduled to restart daily. The Windows service will be stopped at 00:00 and started at 00:15 AM.

You can change the restart settings in the Scheduled Task option of the Windows Control Panel.
true-Advice Web Windows console
Starting true-Advice Web as console
If you want to run true-Advice Web as a console application, run the following executable file:
C:\Program Files\keyon\true-Advice\trueAdvice Console.exe
Make sure that the Windows Service is not running when starting true-Advice Web as a console.
On an operating system with UAC enabled run the executable as Administrator.

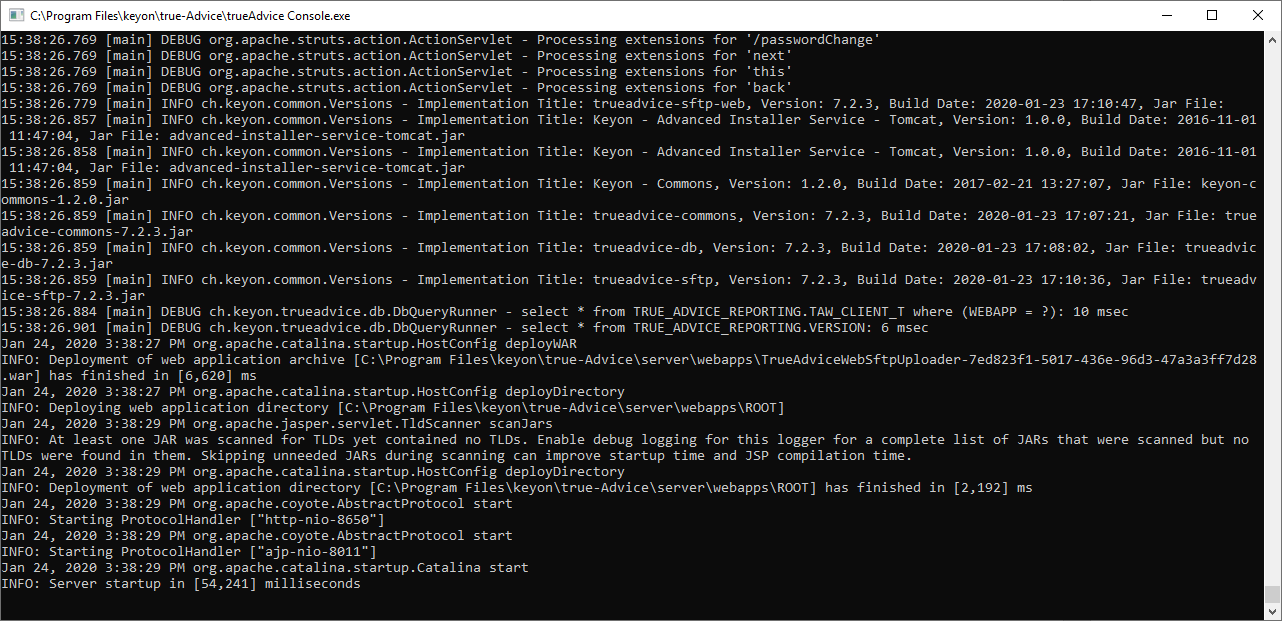
True-Advice Web is starting as console application.
Stopping true-Advice Web console
If true-Advice Web is running as a console application, press Control-C in the console window to stop the application.
true-Advice Web Administration
true-Advice Web Administration is a web application running on an Apache Tomcat server. true-Advice Web is multi-client capable. Use the true-Advice Web Administration application to load or delete true-Advice Web licenses. If you add a new true-Advice Web license a new web application is deployed to the Apache Tomcat server.
The URL to access true-Advice Web Administration is:
http://localhost:8650/TrueAdviceWebAdmin/main.do
Use the link above or select the true-Advice Web menu item in the keyon → true-Advice Web menu to open the URL above in your default browser.
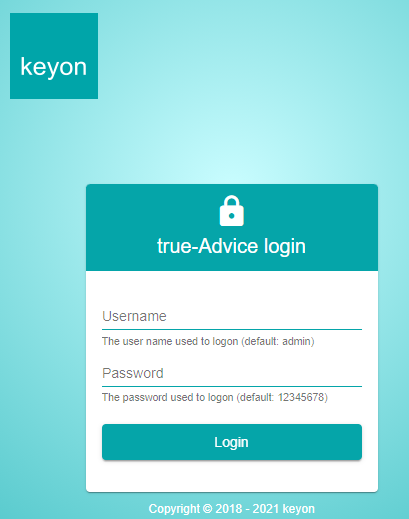
Login page
To get access to the true-Advice Web Administration web application you have to login with a username and password.
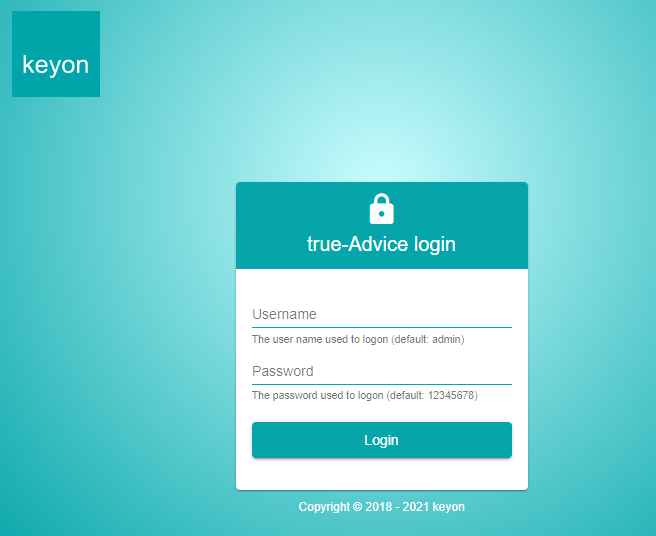
The default username is admin. The default password is 12345678.
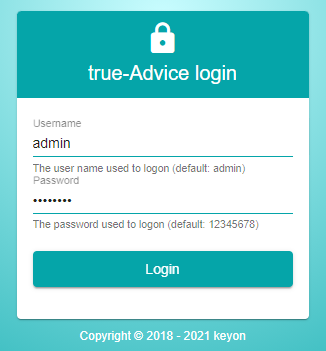
Press the Login button to log on to the application.
You can change the administrator password using the User management link.
Main page / Load License
The main page is used to load the true-Advice Web licenses. true-Advice Web is multi-client capable. For each license a new true-Advice Web application is deployed on the Apache Tomcat server.
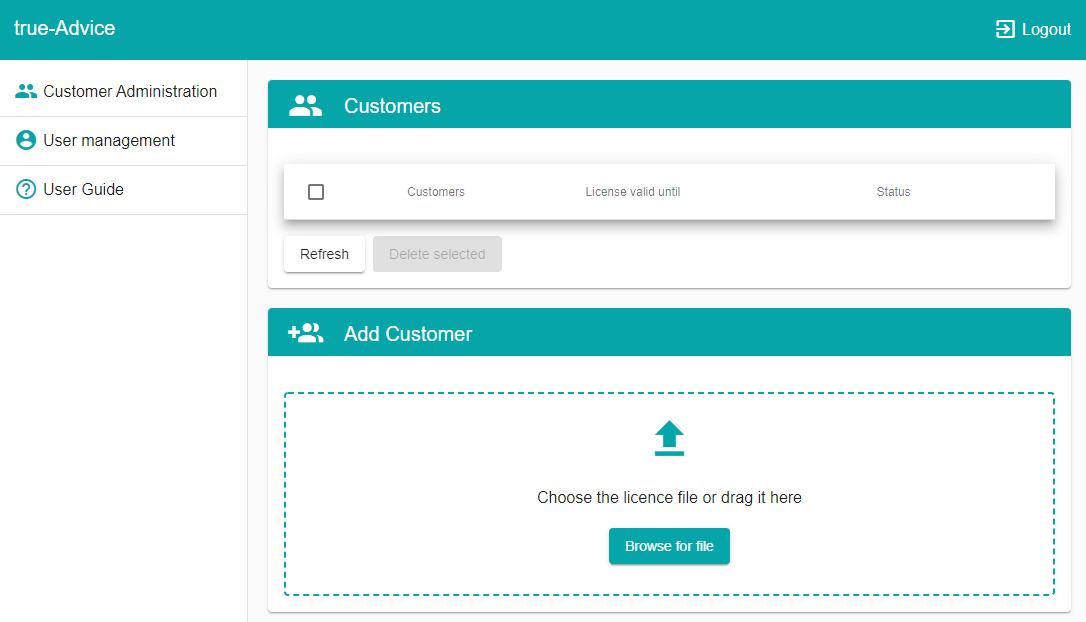
To add a new license, press the Browse for file button or drag it into the area to load the license file you received from SITS.
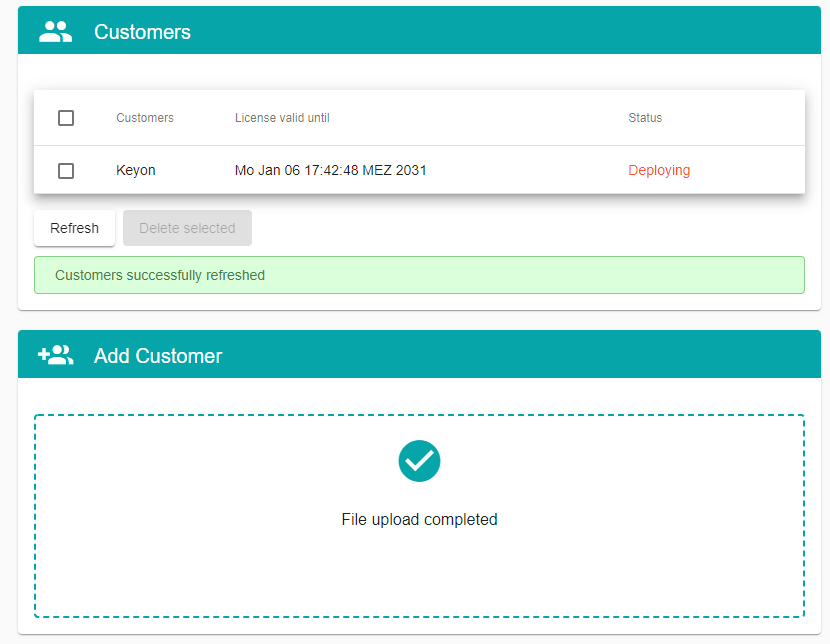
The tool starts to deploy the new license immediately. This might take a few minutes. Click on Refresh to update the status.
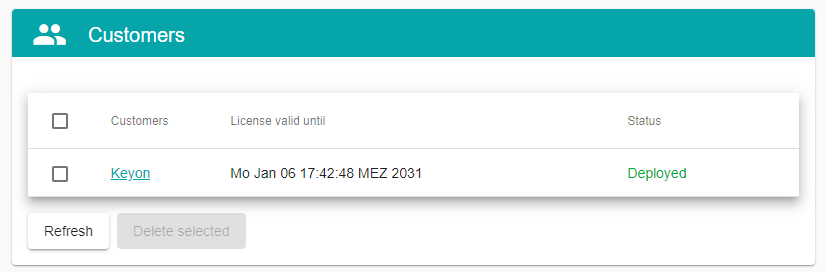
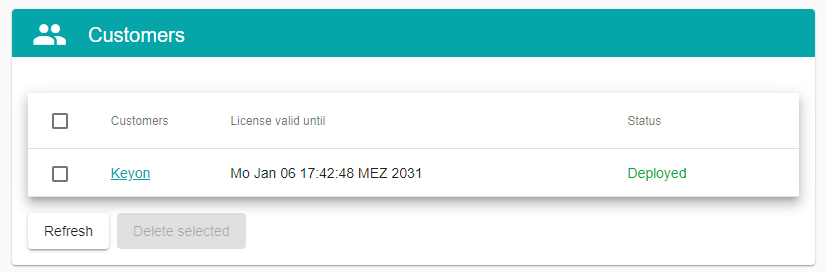
Once it’s done, the status shows Deployed and the license and its modules can be accessed by clicking on the link of the Customers name. (e.g. Keyon in this example)
To delete a license, select the license name and press the Delete selected button.
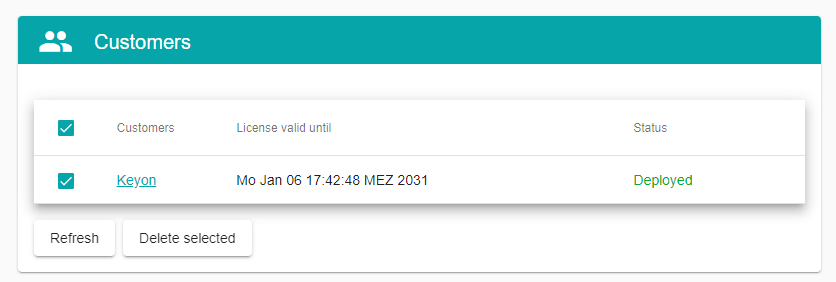
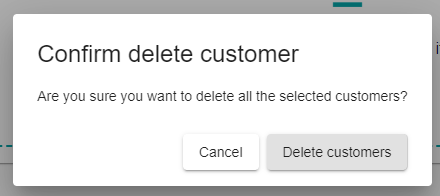
Press Delete customers to confirm the action.
| Be aware that the configuration of the client web application will be deleted. Messages stored in the internal database are also deleted. Messages downloaded to the configured inbox are not deleted. |
|---|
User Management Page
Use the User management link to add or remove a user. This is only available for users with administrative rights.
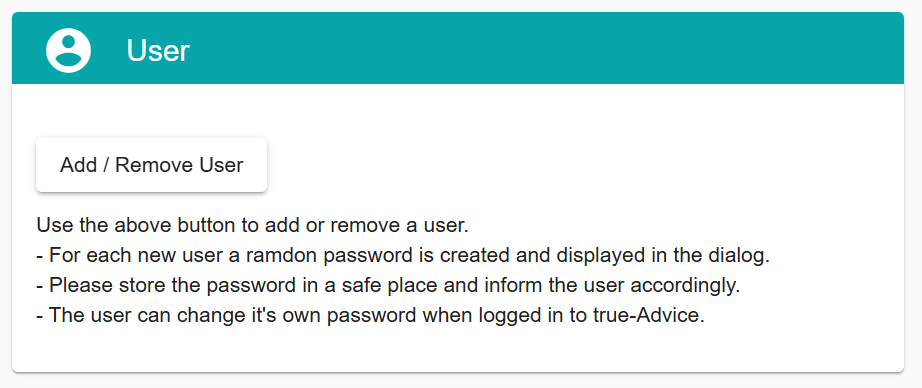
Click on Add / remove User to show the list of existing users.
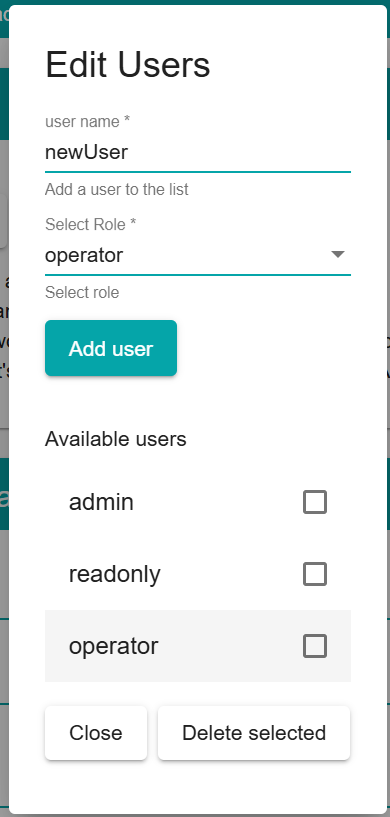
Add a user
To add a new user, enter a name and chose the required role, then click on Add user.
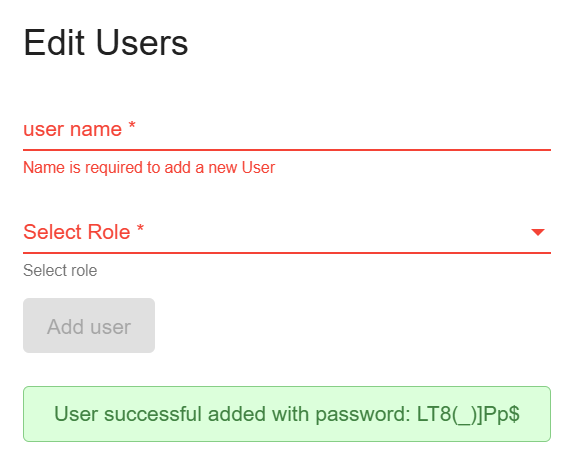
True-Advice will add the user and generate a random password which is shown in the green message bar. This needs to be provided to the user. The user can then use these credentials to login and change the password to a new one as described in the chapter 5.4.
Remove a user
To remove a user, select the username in the list and click on Delete selected.
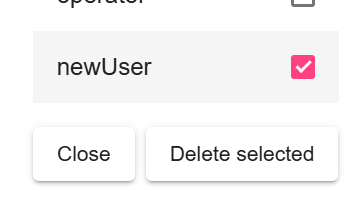
Removing a user does not have any other impact on the system. It will only prevent anybody from logging in with this username.
Reset a password
There is no option to reset a password of a user. If a user forgot the password, the user needs to be deleted and recreated as described above.
Available roles
See below list of available roles and their rights.
- Administrator
- Can add and remove users
- Can execute any action available within the tool
- Operator
- Can execute any action available within the tool
- Readonly
- Can view all pages, but cannot execute any action within the tool
It is not possible to add additional roles.
Change password page
Use the User management link to change your password.
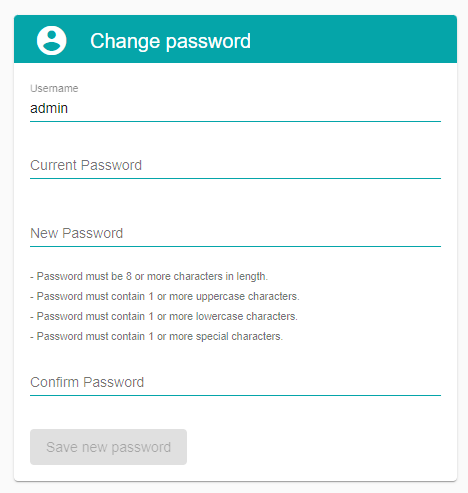
Enter the current and the new password and confirm it.
Press the Save new password button to change the password.
Logout
To log off from the true-Advice Web Administration application press the Logout button in the upper right corner.

Pressing the Logout button redirects you to the Login page.
True-Advice Web Instance
For each loaded license a separate true-Advice Web Instance application is deployed. It can be accessed by clicking on the customer’s name of the license in the true-Advice Web Administration app.
Login page
To get access to the true-Advice Web Instance Web application you have to login with a username and password.
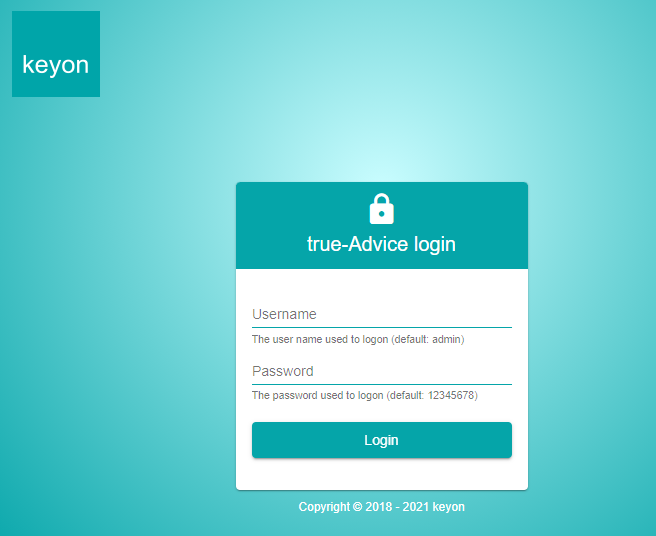
The default username is admin. The default password is 12345678.
Main Page / Module status
The main page shows you the status of all licensed modules and their last startup time.
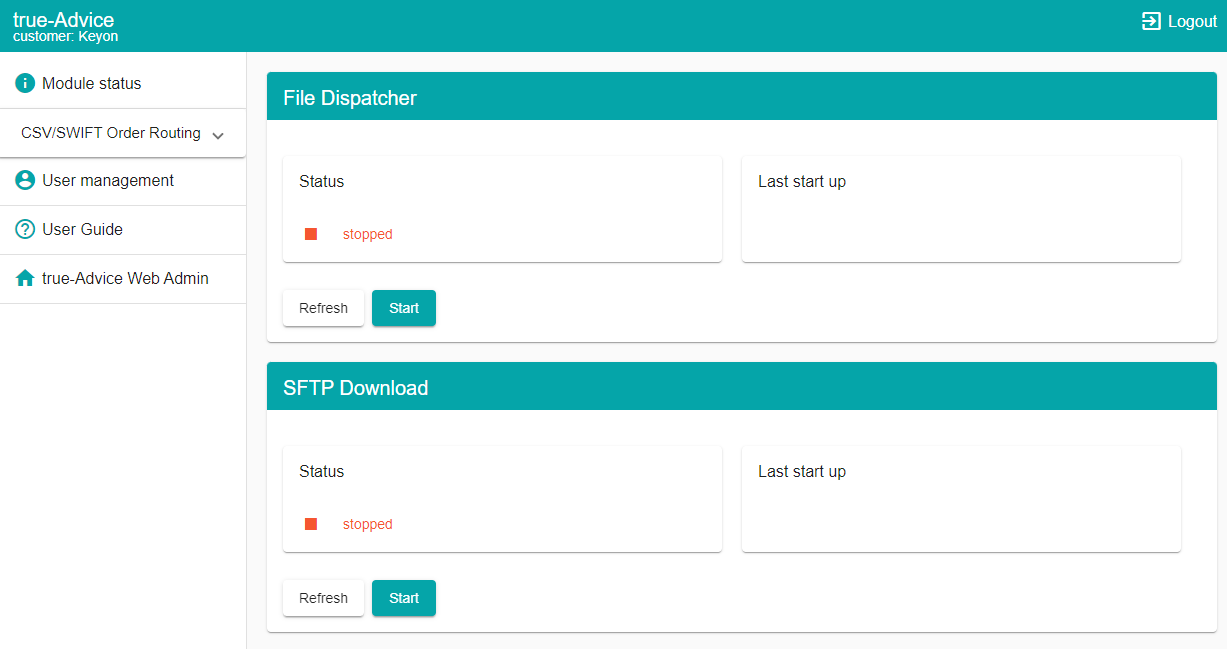
- Module status
- Shows this main page
- User management
- Allows you to change the password (See chapter 0 for details)
- User Guide
- Shows this user guide of true-Advice Web
- true-Advice Web Admin
- Link to the administration app of true-Advice Web
CSV Converter
The CSV Converter module is based on the reporting module and is used to convert SWIFT messages into CSV files.
Main page
The main page is used to trigger a conversion of messages.
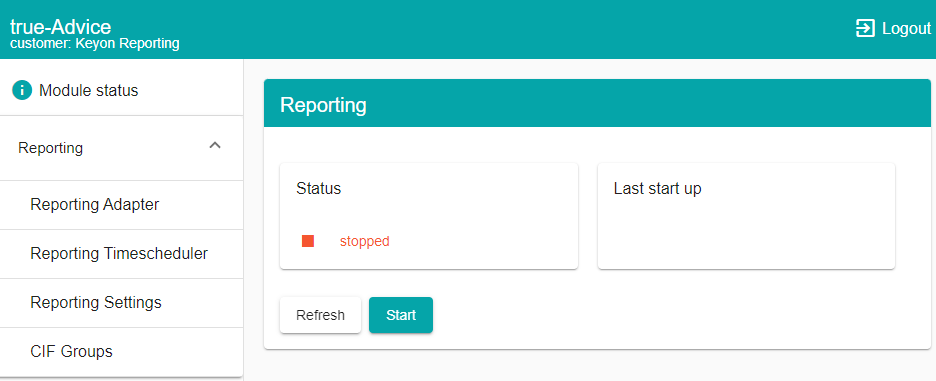
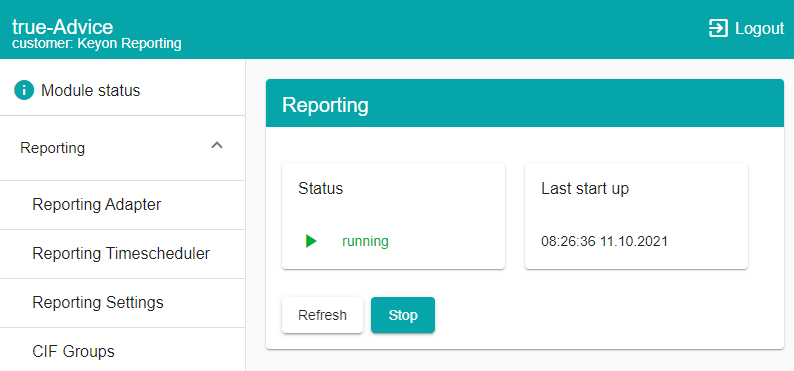
Once the application is running you can use the Refresh button to update the state.
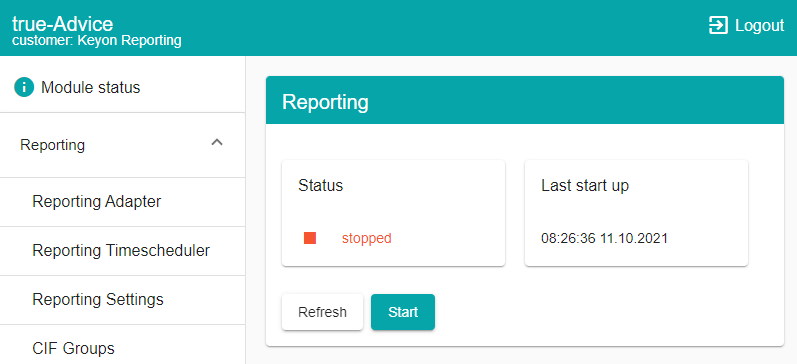
Once all messages are converted, it will return to the stopped state.
Adapter configuration page
Use the Reporting Adapter page to configure where to store your messages.
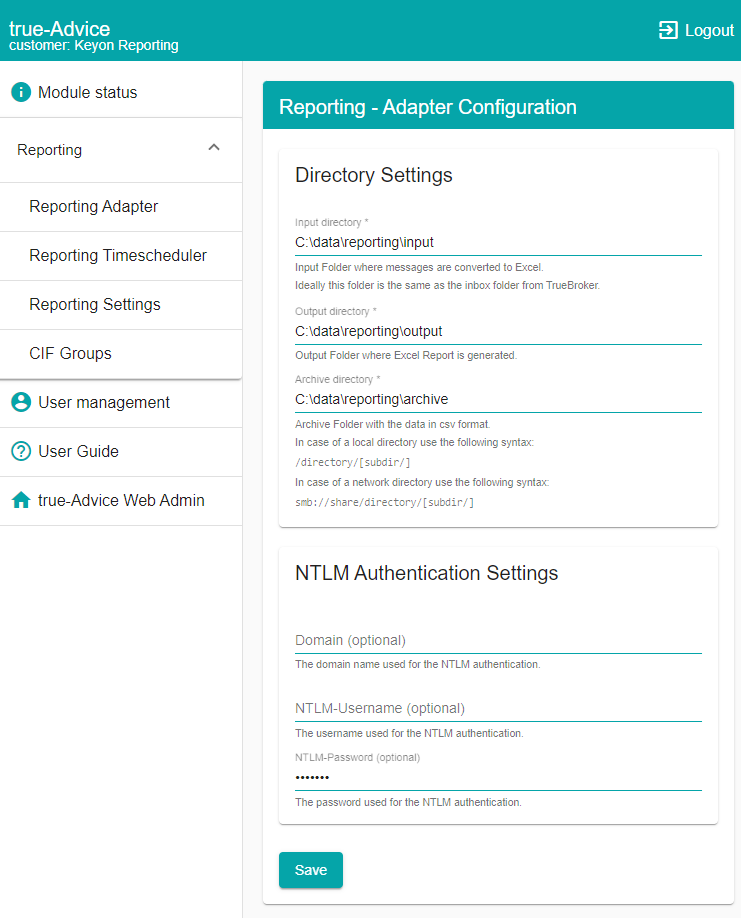
The Input directory defines the directory where SWIFT messages are read from. Ideally the same folder as the true-Broker inbox directory is configured. The Output directory defines where the converted messages are stored.
Use the following syntax if you want to store the messages in a local directory:
/directory/[subdirectory/]
In case of a network directory use the following syntax:
You can optionally copy the URL of your network directory from your explorer:
Do not use mapped network drives. The Tomcat Apache server is using the System account to run and does not have access to mapped network drives.
Please define the domain, username and password to access the network directory.
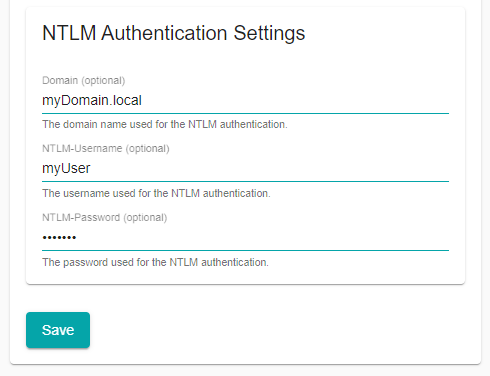
Press the Save button to save your changes.
Time scheduler configuration page
Use the Time scheduler configuration page to configure the scheduled run of the message conversion.
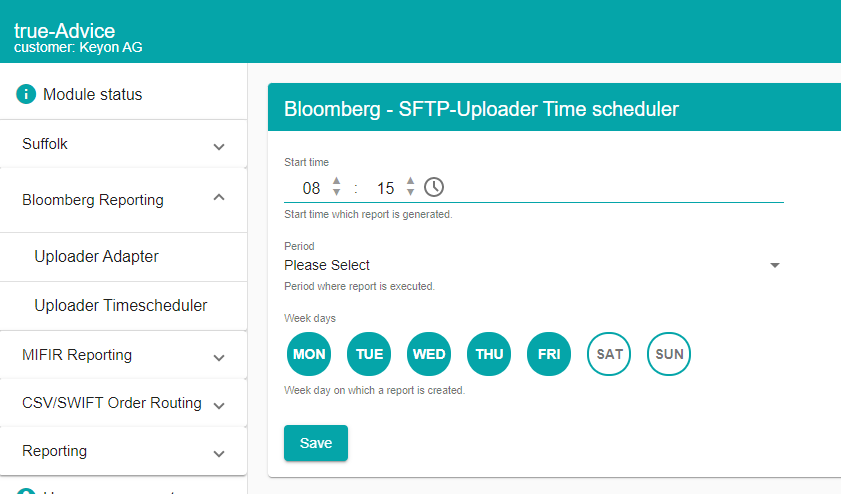
Enter the desired time to run the conversion and select the days on which the conversion should run. The select menu Period gives the Time scheduler the possibility to execute a task based on the selected time interval specified in minutes or hours described in chapter 9.3.
The default configuration is Mo – Fri. at 08:00 am.
Press the Save button to save to configuration.
CSV - Reporting configuration page
Use the Reporting configuration page to change the reporting settings.
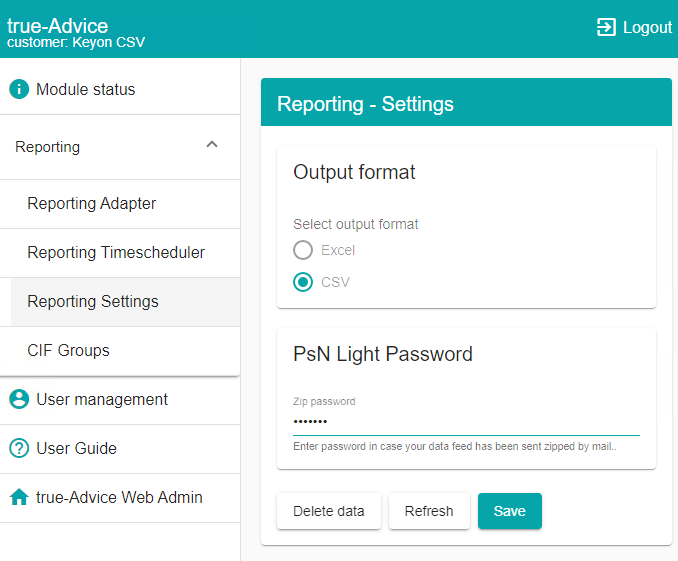
With only the CSV Converter license loaded, the options are minimal.
PsN Light password
To convert an encrypted PsN Light ZIP file, the password of the ZIP file needs to be configured.
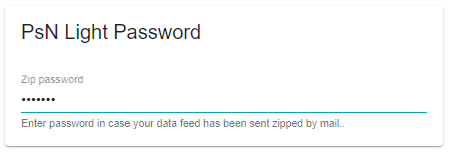
Enter the password and press the Save button.
To remove the password, press the Clear PW button.
Clean database
To remove all message related data – including any created CIF Groups – from the database, press the Clean DB button.
This will not remove any configuration settings from the DB.
Reporting
The Reporting module is used to convert SWIFT messages into either CSV files or an Excel report.
Main page
The main page is used to trigger a conversion of messages.
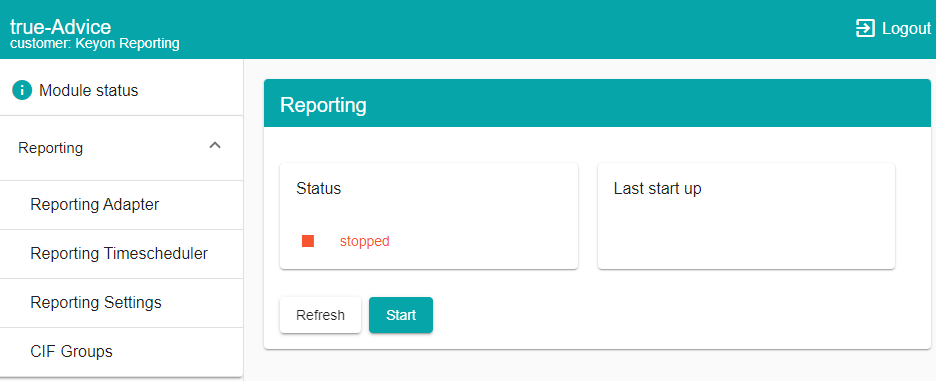
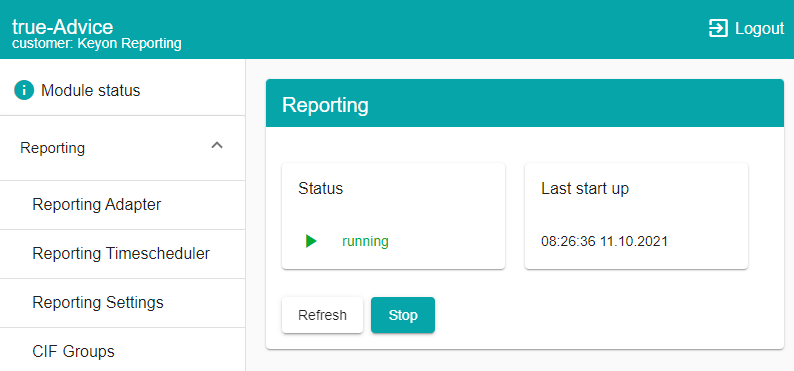
Once the application is running you can use the Refresh button to update the state.
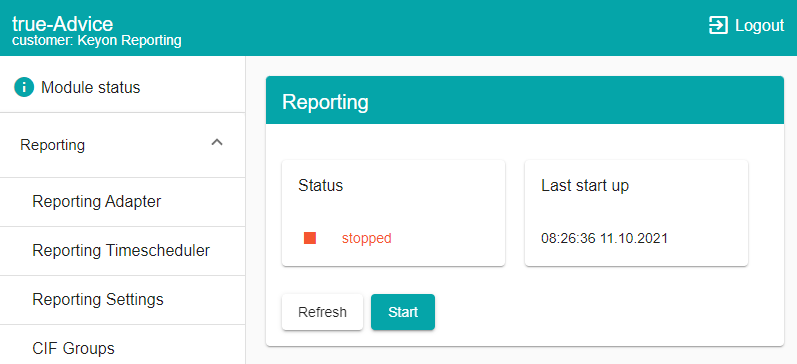
Once all messages are converted, it will return to the stopped state.
Adapter configuration page
Use the adapter configuration page to configure where to store your messages.
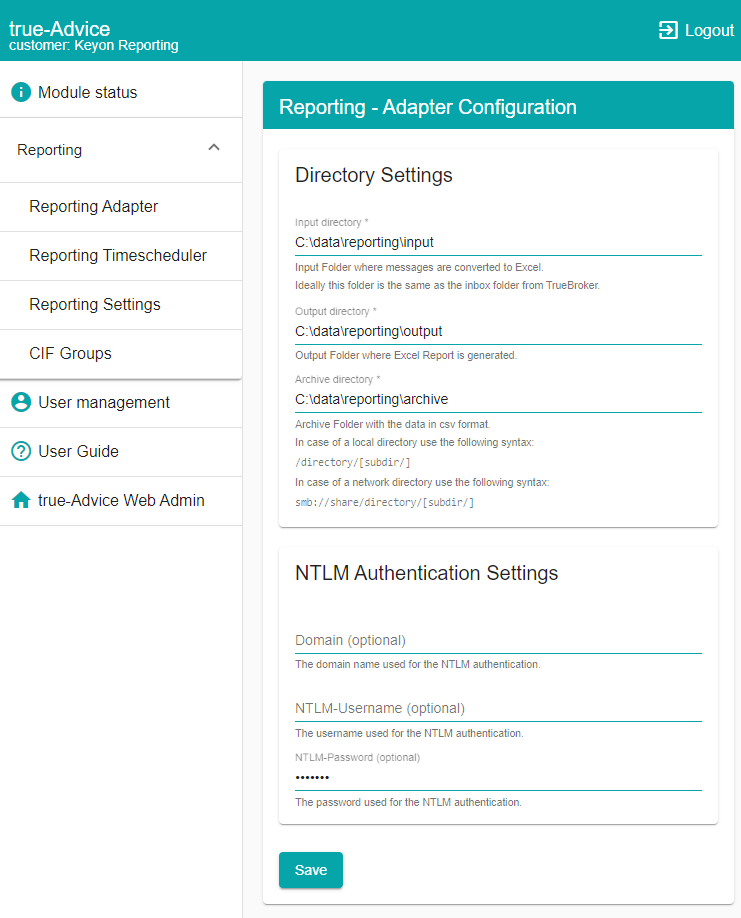
The Input directory defines the directory where the to be converted messages are read from. Ideally the same folder as the true-Broker Inbox directory is configured in case SWIFT messages are used.
The Output directory defines the directory where the resulting reports are stored.
The Archive directory defines the directory where the original messages are stored after the conversion. The original SWIFT messages are stored in a sub folder called SWIFT, the converted CSV message are stored directly in the archive folder in a daily ZIP file.
Use the following syntax if you want to store the messages into a local directory:
/directory/[subdirectory/]
In case of a network directory use the following syntax:
You can optionally copy the URL of your network directory from your explorer:
Do not use mapped network drives. The Tomcat Apache server is using the System account to run and does not have access to mapped network drives.
Please define the domain, username and password to access the network directory.
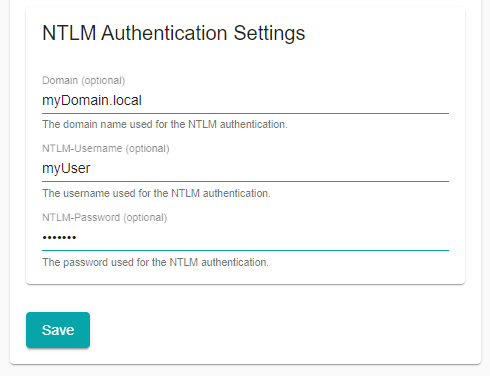
Press the Save button to save your changes.
Time scheduler configuration page
Use the Time scheduler configuration page to configure the scheduled run of the message conversion.
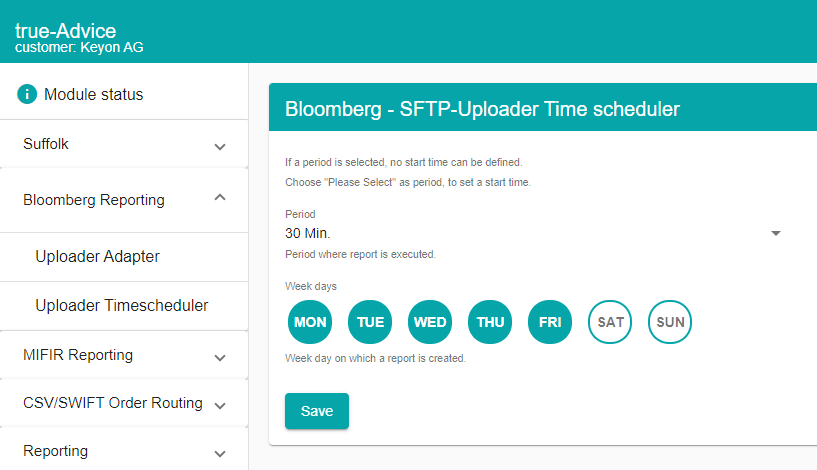
Either enter the desired time to run the conversion on or select a periodicity on which the report should be executed. Furthermore, select the days on which the conversion should be run.
The picture above shows the scheduler configured to be executed every 30 minutes. Disabling the periodically execution can be done by setting the Period menu item to <<Please Select>>, in this case the scheduler will be executed at the specified start time.
The default configuration is Mo – Fri. at 08:00 am.
Press the Save button to save to configuration.
Reporting Settings page
Use the reporting configuration page to change the Reporting settings.
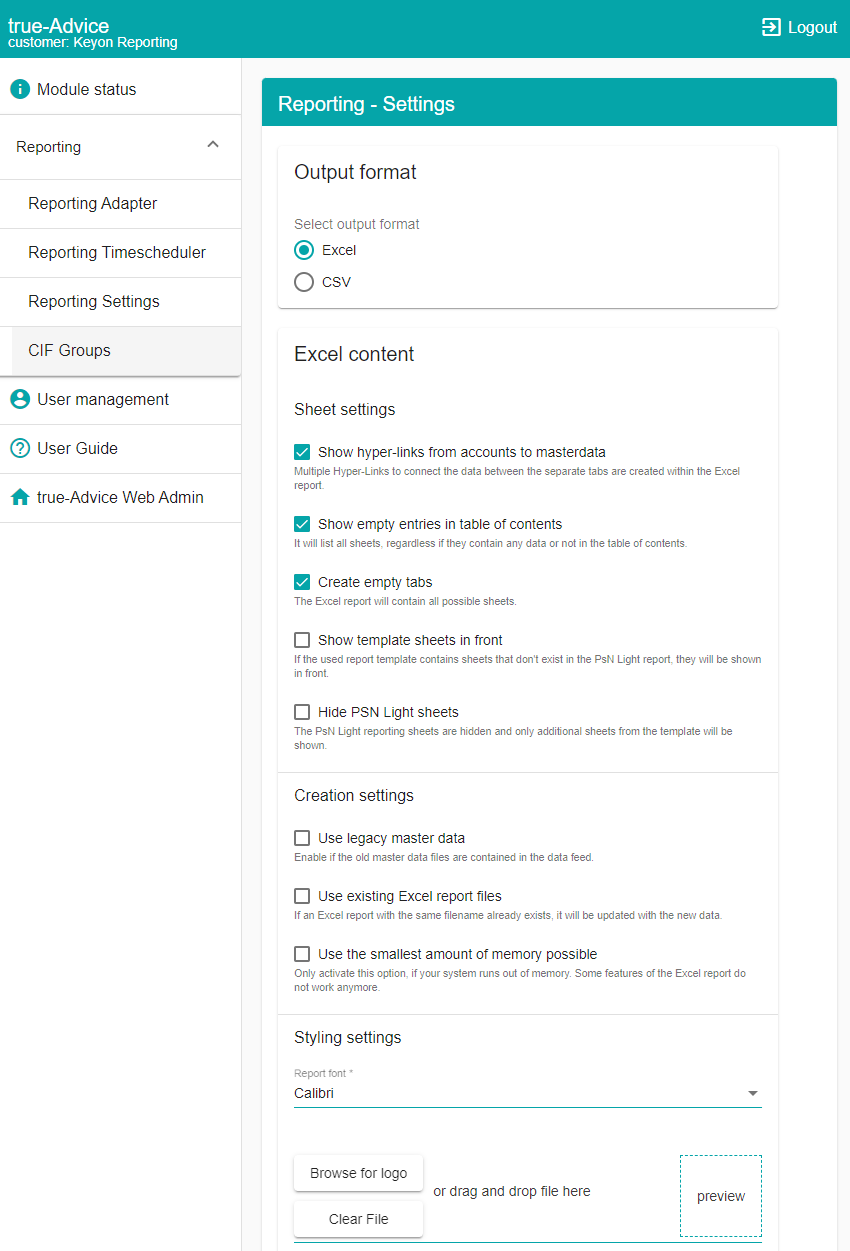
Content Settings
| Setting | Description | Default |
|---|---|---|
| Excel output format | SWIFT messages are converted into an Excel report | Excel |
| CSV output format | SWIFT messages are converted into CSV files | Excel |
| Show hyper-links | Hyper-links are created in the Excel report between sheets which can be related | True |
| Show empty entries | The table of content of the Excel report will include links to empty sheets | True |
| Create empty tabs | The report will include empty sheets | True |
| Use the smallest amount of memory possible | The Excel report will not be held in memory, but directly written to the hard-drive and therefore reduce the memory usage. However this causes that e.g. hyper-links between the sheets can no longer be created. | False |
| Use existing Excel report files | If an Excel report with the same name already exists in the output directory, it will be enhanced with the newly converted messages. To have a report per day, which is updated on an hourly basis. The date format in the file name needs to be set to not include the time. See “Report Settings” below | False |
| Show template sheets in front | All sheets which exist in the template will be moved to the front / left in the Excel report. | False |
| Hide PSN Light sheets | Only sheets which exist in the template will be shown. All other sheets will be hidden | False |
| Use legacy masterdata | Report will be created based on legacy masterdata. Only use this if adviced by UBS or SITS. | False |
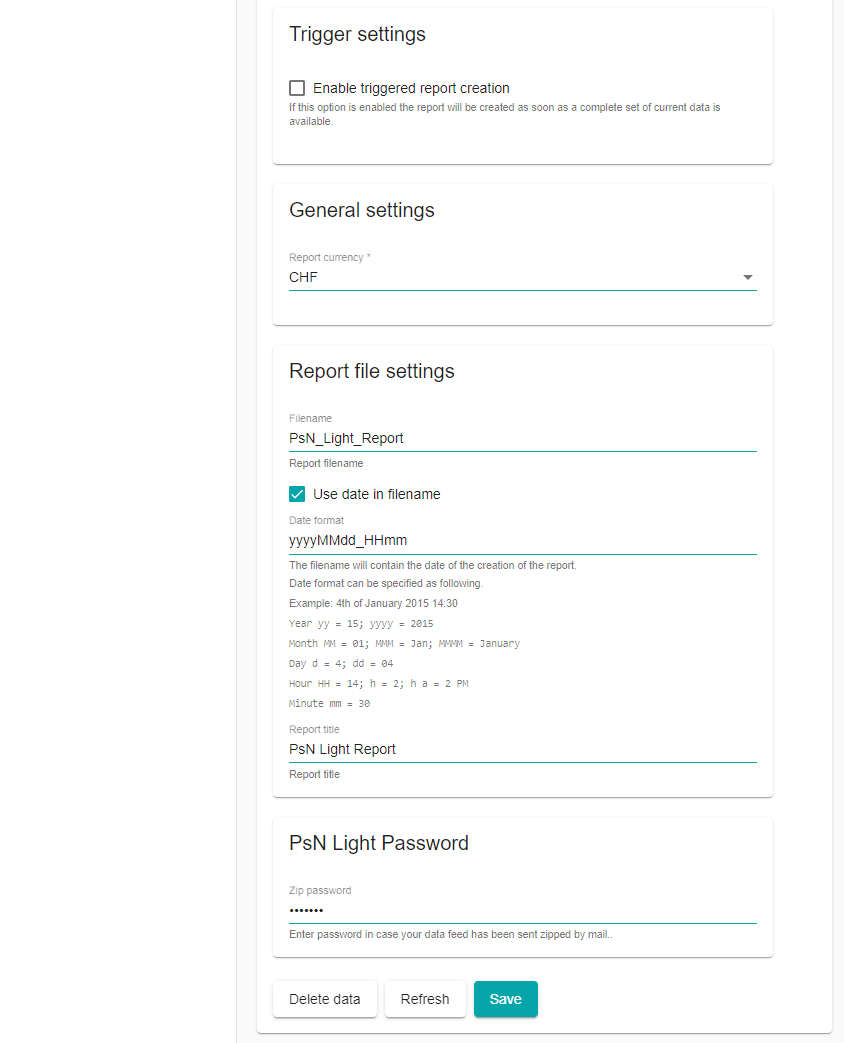
| Enable triggered report creation | The module will check if all masterdata are available, if not it will wait for the configured sleep time and check again. The report is only created once all messages have been received. | False |
| Sleep time for triggered report | Sleep time for above mentioned option | 600’000 ms / 10 min. |
Report Settings
| Setting | Description | Default |
|---|---|---|
| Filename | Filename of the created Excel report | PsN_Light_Report |
| Use date in filename | Filename will be appended by current date | True |
| Date format | Format of the date which is appended. **Example:**Year yy = 19; yyyy = 2019 Month MM = 01; MMM = Jan; MMMM = January Day d = 4; dd = 04 Hour HH = 14; h = 2; h a = 2 PM Minute mm = 30 Default yyyyMMdd_HHmm = 20190104_1430 | yyyyMMdd_HHmm |
| Report title | Title shown on the content overview page of the Excel report | PsN Light Report |
| Report currency | Currency used on the “Summary” and “Customer Report” sheets of the Excel report | CHF |
| Font | Font used in the Excel report | Calibri |
| Logo | Logo which is shown on the content overview page of the Excel report | None |
PsN Light password
To convert an encrypted PsN Light ZIP file, the password of the ZIP file needs to be configured.
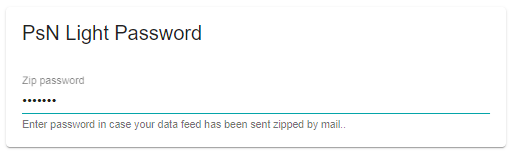
Enter the password and press the Save button.
To remove the password, delete the content and press the Save button.
Clean database
To remove all message related data – including any created CIF Groups – from the data-base, press the Delete data button.
This will not remove any configuration settings from the DB.
CIF Groups
Use the CIF Groups setting page to create CIF Groups for which a report should be created.
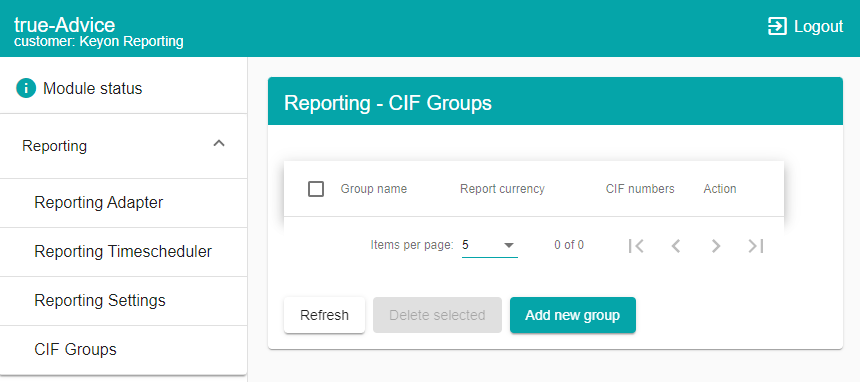
For each configured CIF group, a separate Excel report will be created, which only contains data related to the configured customer CIFs.
Add a CIF Group
Enter a name for the group and press the Add Group button.
The name of the group will be appended to the filename of the report.
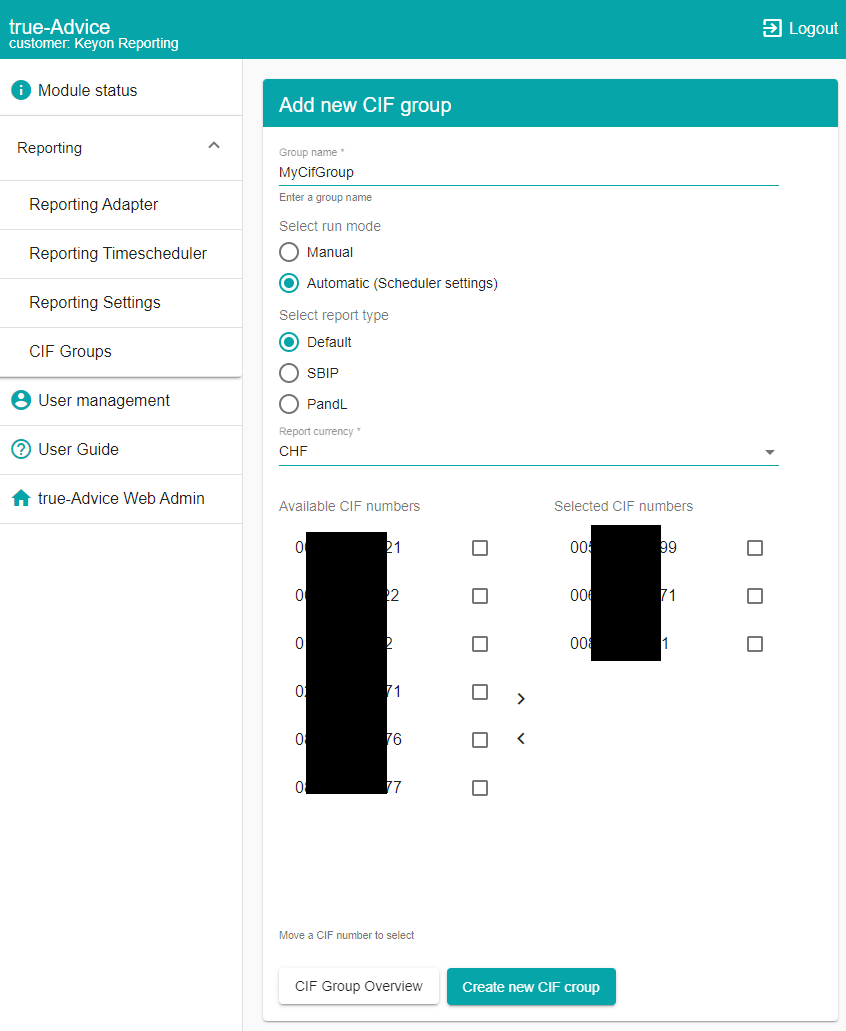
Choose the Report type and select the CIFs you’d like to add to this CIF group and move them to the “Selected CIF number” part by clicking on the arrow or dragging them across. For more details, please see chapter 8.5.2.
Configure a CIF group
Press the Edit button for the CIF group to configure
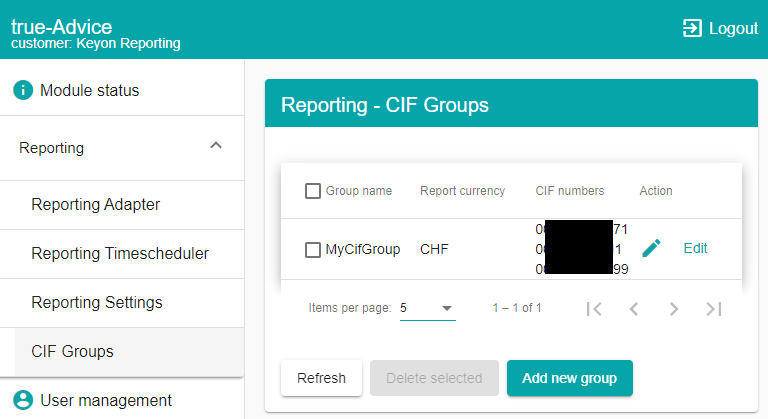
The Excel report must be created at least once, before a CIF group can be created.
Once the report has been run, the available CIFs are shown in the above screen. Select the needed CIFs and press on the arrow right button or drag the CIF across.
To remove CIFs from the group, select the CIFs in the “Chosen CIFs” list and press on the arrow left button or drag the CIF across.
| Setting | Description | Default |
|---|---|---|
| Run mode | DAILY – Report for this group is created as configured in the Time scheduler. See 8.3 MANUAL – Report is only created if the module is run manually. See 0 | DAILY |
| Report Type | Default – Standard Excel report SBIP – Only create sheets related CH data PandL – Add columns showing PandL | Default |
| Report Currency | Currency used on the “Summary” and “Customer Report” sheets of the Excel report | CHF |
Usage
Report format
The format of the Excel report is based on the PsN Light format of UBS. A detailed description can be found here:
https://www.keyon.ch/transfer/trueAdviceReporting/CSPsNLightFormatDescription.zip
Data archive
true-Advice does not delete any files. The processed files are stored in the archive folder as configured. (See Chapter 8.2) The original SWIFT files are stored in a subfolder called SWIFT. The converter PsN Light (CSV) files are stored in a daily ZIP file directly in the archive folder.
Rerun a report
The report can be manually started as described in Chapter 8. To reuse the data of previously created report, simply copy or move the according ZIP file from the archive folder back into the input folder prior to executing the report. The ZIP files do not need to be extracted.
Templates
Templates can be used to customize the created Excel report. true-Advice can use an existing Excel file as template, and it will add all sheets or enhance existing sheets. This way Excel formulas can be used to extract or calculate values from the created PsN Light sheets into new customized sheets.
Template file
The template file is located here:
- C:\ProgramData\keyon\true-Advice\cfg\default\TrueAdviceReporting_Template.xlsx
It can be changed or replaced by another template. true-Advice will automatically pick up the file from this location.
An example template file is located here:
- C:\ProgramData\keyon\true-Advice\cfg\default\TrueAdviceReporting_Template-Example.xlsx
Create a template
- Create a new Excel file
- Add the sheet you would like to see in your report (e.g. MySafekeepings)
- Add Excel formulas to collect / calculate the values you’d like to see in that sheet. For example:
- To see the safekeeping account in column A use the below formula:
='Safekeeping Accounts'!R5
An empty sheet “Safekeeping Accounts” needs to exist in the template. - To see the respective ISIN in column B use the below formula:
='Safekeeping Accounts'!AB5
An empty sheet “Safekeeping Accounts” needs to exist in the template. - To see the description of the ISIN in column C use the below formula:
=VLOOKUP(B2;'Financial Instrument Info'!B5:AB494;27;FALSE)
An empty sheet “Financial Instrument Info” needs to exist in the template. - Expand the formula until all accounts are shown.
- Safe the file as TrueAdviceReporting_Template.xlsx and replace the original template with the path mentioned above.
- To see the safekeeping account in column A use the below formula:
All available Excel formulas can be used in the template, true-Advice will fill all the empty sheets with the latest data and afterwards execute / calculate the formulas.
It is not possible to have multiple templates, if the template contains macros it needs to be named TrueAdviceReporting_Template.xlsm and the original template file needs to be removed.
It is the responsibility of the customer to create and maintain such customized templates.
M/L Report
The M/L Report module is based on the Reporting module and creates a specific Margin Lending report, based on the raw data from UBS. This option is currently only available for customers in APAC.
Configuration
For a detailed description of the Reporting module, please refer to chapter 8. This chapter only explains the M/L Report specific configuration settings.
| Setting | Description | Default |
|---|---|---|
| Create report for all CIFs | Creates a report for all customer, even if there are no lending / collateral available | False |
| Include collateral disclaimer | Option to exclude the disclaimer from the created report | False |
Report
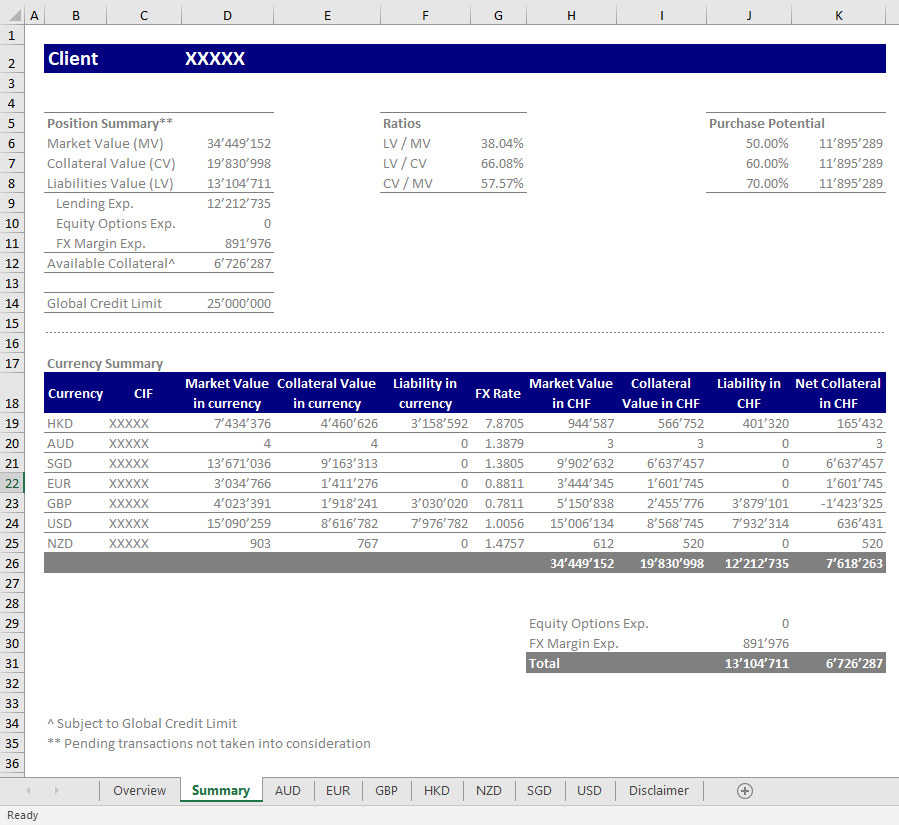
The report consists of a summary page which shows – amongst other values – the overall Market Value, Collateral Value and Liabilities Value of the client.
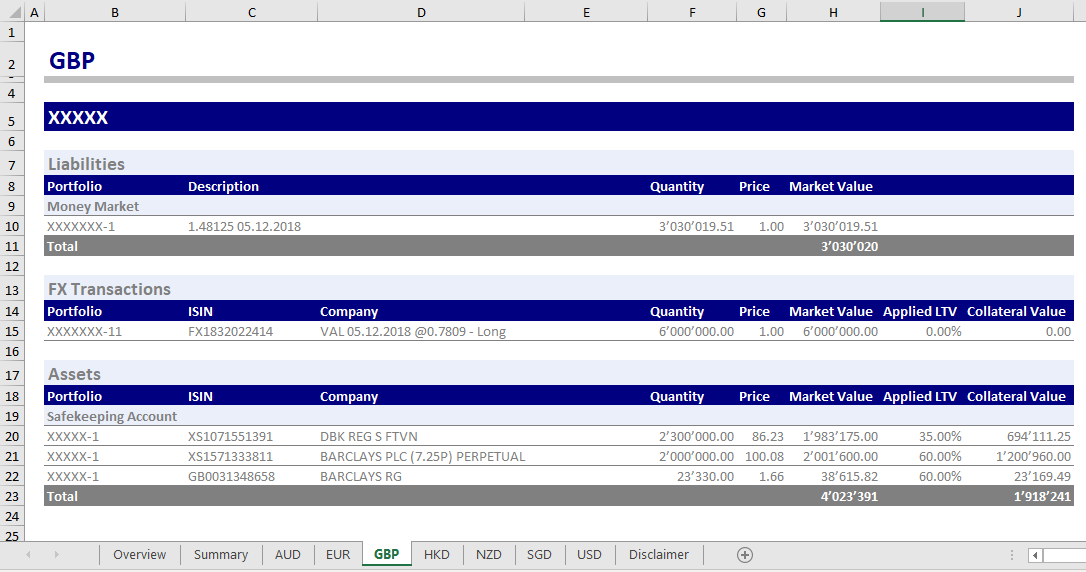
Furthermore, it contains a separate sheet per currency, which contains a detailed list of all assets and liabilities held in the respective currency.
MiFIR Report
The MiFIR Report module is based on the Reporting module and creates an Excel report in the format specified by UnaVista, which contains all required attributes for the MiFIR report.
Configuration
For a detailed description of the Reporting module, please refer to chapter 8. There are no options specific to the MiFIR Report.
Template
To create the MiFIR Report, a specific template needs to be configured. For details regarding templates please refer to chapter 8.6.
The MiFIR template – which is provided by SITS – contains a sheet which includes all the static data needed to enhance the data received from UBS to create all columns required by MiFIR. This sheet needs to be maintained by the customer.
Static Data
| Column | Description |
|---|---|
| Account | Account Number |
| Buyer ID Type | *L (LEI) *N (National ID) *M (MIC) *I (Internal) |
| Buyer ID Sub Type | If Buy ID type = N; NIDN Else, LEAVE_BLANK |
| Buyer ID | Code used to identify the acquirer of the financial instrument. Where the acquirer is a legal entity, the LEI code of the acquirer shall be used. Where the acquirer is a non-legal entity, the identifier specified in Article 6 shall be used. |
| Buyer Country of Branch | ISO-2 Code of Country |
| Buyer First Name | Full first name(s) of the Buyer. In the case of more than one first name, all names shall be included in this field separated by a semicolon. For repeating values use a " ; " to separate each value eg a;b;c |
| Buyer Surname | Full surname(s) of the Buyer. In case of more than one surname, all surnames shall be included in this field separated by a semicolon. For repeating values use a " ; " to separate each value eg a;b;c |
| Buyer DOB | Date of birth of the Buyer. In the case of more than one Date of birth all dates of birth shall be included in this field separated by a semicolon. For repeating values use a " ; " to separate each value eg a;b;c |
| Buyer Decision Maker ID Type | *L (LEI) *N (National ID) *M (MIC) *I (Internal) |
| Buyer Decision Maker ID Sub Type | If Buy ID type = N; NIDN Else, LEAVE_BLANK |
| Buyer Decision Maker ID | Code used to identify the person who makes the decision to acquire the financial instrument. Where the decision is made by an investment firm, this field shall be populated with the identity of the investment firm rather than the individual making the investment decision. Where the decision maker is a legal entity, the LEI code of the decision maker shall be used. Where the decision maker is a non-legal entity, the identifier specified in Article 6 shall be used |
| Buyer Decision Maker First Name | Full first name(s) of the decision maker for the Buyer. In case of more than one first name, all names shall be included in this separated by a semicolon |
| Buyer Decision Maker Surname | Full surname(s) of the decision maker for the Buyer. In case of more than one surname, all surnames shall be included in this separated by a semicolon |
| Buyer Decision Maker DOB | Date of birth of the decision maker for the Buyer |
| Seller ID Type | *L (LEI) *N (National ID) *M (MIC) *I (Internal) |
| Seller ID Sub Type | If Buy ID type = N; NIDN Else, LEAVE_BLANK |
| Seller ID | Code used to identify the seller of the financial instrument. Where the seller is a legal entity, the LEI code of the seller shall be used. Where the seller is a non-legal entity, the identifier specified in Article 6 shall be used. |
| Seller Country of Branch | Where the seller is a client, this field shall identify the country of the branch that received the order from the client or made an investment decision for a client in accordance with a discretionary mandate given to it by the client as required by Article 14(3).18 |
| Seller First Name | Full first name(s) of the Seller. In the case of more than one first name, all names shall be included in this separated by a semicolon |
| Seller Surname | Full surname(s) of the Seller. In the case of more than one surname, all surnames shall be included in this separated by a semicolon |
| Seller DOB | Date of birth of the Seller |
| Seller Decision Maker ID Type | *L (LEI) *N (National ID) *M (MIC) *I (Internal) |
| Seller Decision Maker ID Sub Type | If Buy ID type = N; NIDN Else, LEAVE_BLANK |
| Seller Decision Maker ID | Code used to identify the person who makes the decision to acquire the financial instrument. Where the decision is made by an investment firm, this field shall be populated with the identity of the investment firm rather than the individual making the investment decision. Where the decision maker is a legal entity, the LEI code of the decision maker shall be used. Where the decision maker is a non-legal entity, the identifier specified in Article 6 shall be used For repeating values use a " ; " to separate each value eg a;b;c |
| Seller Decision Maker First Name | Full first name(s) of the decision maker for the Seller. In the case of more than one first name, all names shall be included in this separated by a semicolon For repeating values use a " ; " to separate each value eg a;b;c |
| Seller Decision Maker Surname | Full surname(s) of the decision maker for the Seller. In case of more than one surname, all surnames shall be included in this separated by a semicolon For repeating values use a " ; " to separate each value eg a;b;c |
| Seller Decision Maker DOB | Date of birth of the decision maker for the Seller For repeating values use a " ; " to separate each value eg a;b;c |
| Investment Decision ID Type | *L (LEI) *N (National ID) *M (MIC) *I (Internal) |
| Investment Decision ID Sub Type | If Buy ID type = N; NIDN Else, LEAVE_BLANK |
| Investment Decision ID | Code used to identify the person or algorithm within the investment firm who is responsible for the investment decision. For natural persons, the identifier specified in Article 6 shall be used If the investment decision was made by an algorithm, the field shall be populated as set out in Article 8. Field only applies for investment decision within the firm. Where the transaction is for a transmitted order that has met the conditions for transmission set out in Article 4, this field shall be populated by the receiving firm within the receiving firm’s report using the information received from the transmitting firm. |
| Investment Decision Country of Branch | Code used to identify the country of the branch of the investment firm for the person responsible for the investment decision as set out in Article 14.3(b). |
| Firm Execution ID Type | *N (National ID) *A (Algorithms) *C (Client) |
| Firm Execution ID Sub Type | If Buy ID type = N; NIDN Else, LEAVE_BLANK |
| Firm Execution ID | Code used to identify the person or algorithm within the investment firm who is responsible for the execution. For natural persons, the identifier specified in Article 7 shall be used if the execution was made by an algorithm, the field shall be populated as set out in Article 9. |
| Firm Execution Country of Branch | Code used to identify the country of the branch of the investment firm for the person responsible for the execution of the transaction as set out in Article 14.3(c). |
Macros
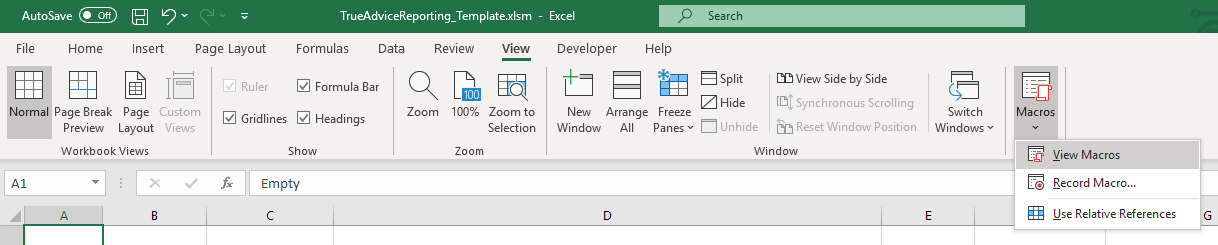
The report is based on the Time Scheduler configuration (see chapter 8.3) once the standard report is created it can be converted into the MiFIR Report by executing two Excel macros.
- Open the report
- Click on the View menu
- Click on Macros 🡪 View Macros
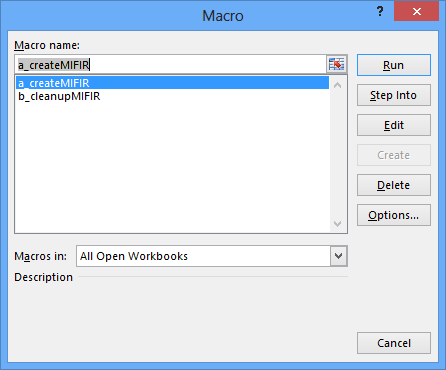
- Execute the first macro***: a_createMIFIR***
- Double check the content of the report
- Execute the second macro: b_cleanupMIFIR
Once both macros have been run, the report consists only of one sheet called MIFIR which contains all transactions since the last report was created, and the enhanced columns sourced by the static data. This report can now be uploaded into the UnaVista web application.
Reporting with Bloomberg®
The Reporting with Bloomberg® module is based on the Reporting module and is used to convert SWIFT messages into an Excel report which is then uploaded to Bloomberg® using an SFTP connection.
It consists of two parts, one for the creation of the report (Reporting) and the second one for the upload to Bloomberg®.
Reporting
For a detailed description of the Reporting module, please refer to chapter 8. This chapter only explains the Bloomberg® specific configuration settings.
| Setting | Description | Default |
|---|---|---|
| Include FX Forwards in the BBGUpload Sheet | If set, FX forwards are also included in the report which is forwarded to Bloomberg®. | True |
SFTP Main page
The main page is used to trigger an upload to Bloomberg®.
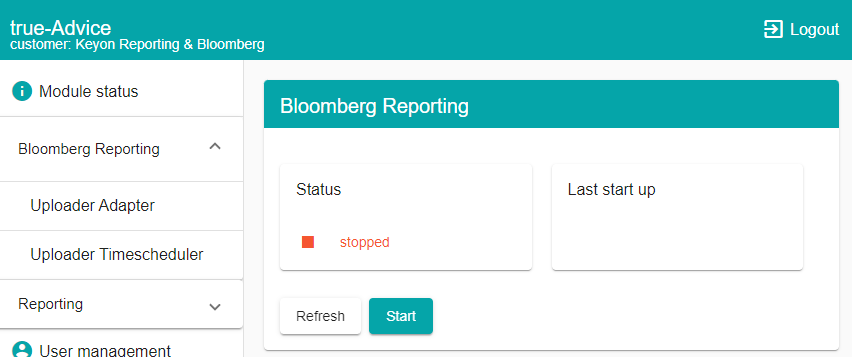
Once the application is running you can use the Refresh button to update the state. However, since the upload of the files only takes a few seconds, the status will normally jump back to stopped straight away. Based on the Last start up timestamp you can verify if it already ran.
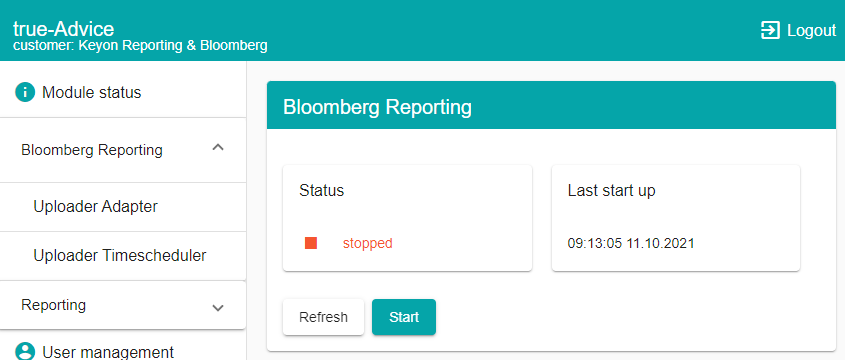
Once all files are uploaded, it will return into the stopped state.
Uploader Configuration
Use the uploader configuration page to configure where to upload your files.
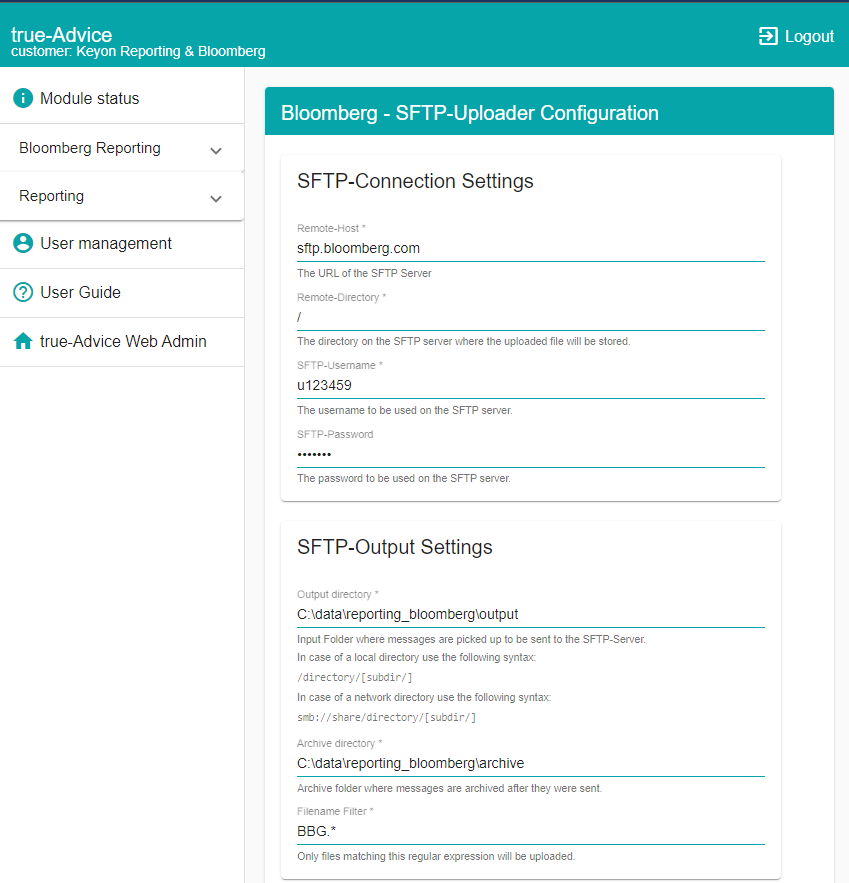
The Remote-Host and Remote-Directory are per default set for the SFTP server of Bloomberg®. The SFTP username and password are provided to you during the setup process by Bloomberg.
The Output directory defines the directory where the files which need to be uploaded are stored. It needs to be the same directory as configured as Output directory in the Reporting module (See Chapter 8.2).
The archive directory defines where the files which were already uploaded are stored.
Use the following syntax, if you want to store the messages in a local directory:
/directory/[subdirectory/]
In case of a network directory use the following syntax:
You can optionally copy the URL of your network directory from your explorer:
Do not use mapped network drives. The Tomcat Apache server is using the System account to run and does not have access to mapped network drives.
Please define the domain, username and password to access the network directory.
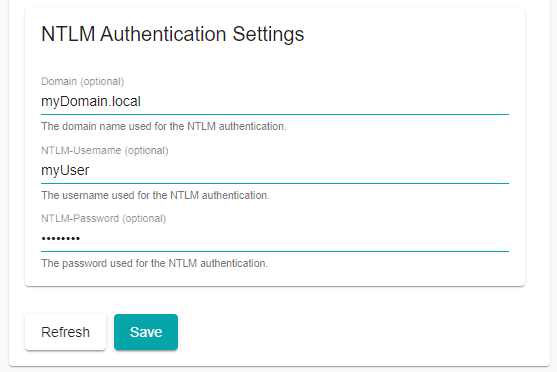
Press the Save button to save your changes
Advanced options
In the advanced options the SSH public and private key which is used to secure the SFTP connection can be configured.
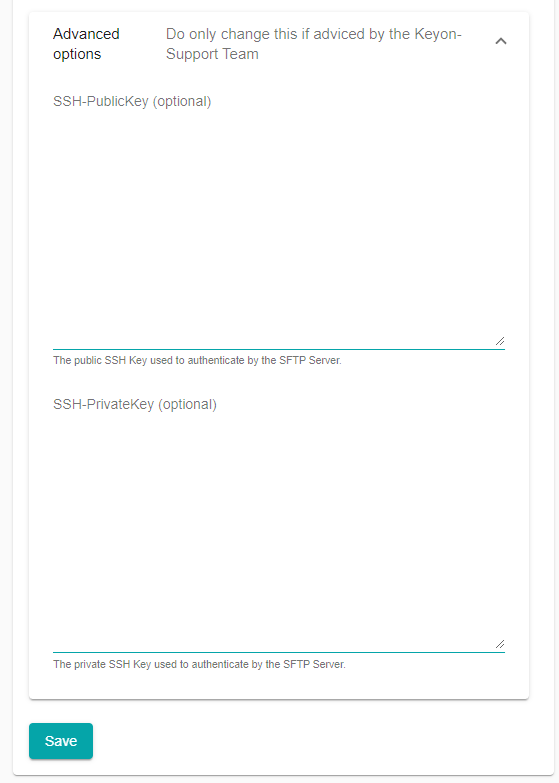
| Do not change these settings, unless you are advised by SITS support to do so. |
|---|
Anonymizing Portfolio for Bloomberg
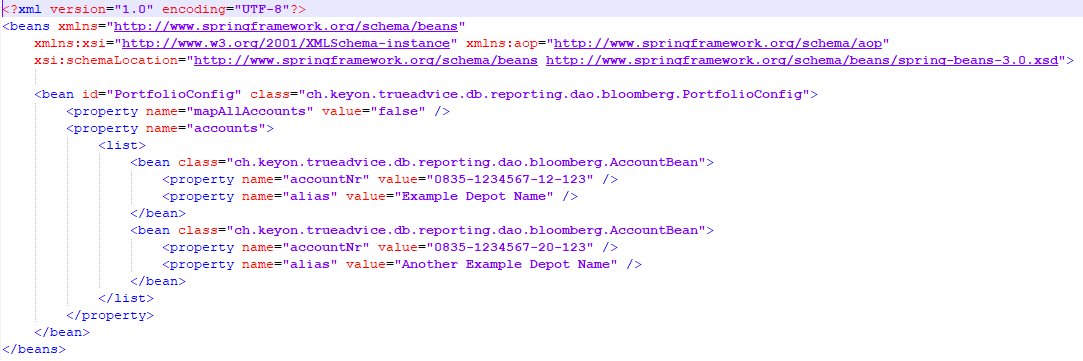
In case the actual portfolio information inside the report for the Bloomberg PORT upload does not need to be sent to Bloomberg, an option to anonymize the portfolio accounts is available. Inside the file C:\ProgramData\keyon\trueAdvice\cfg\BBUPortfolio\BBUPortfolio.xml the information can be configured.
By setting the parameter mapAllAccounts to true and not expanding the accounts list with the accountNr and alias information, the tool generates automatically an alias to substitute the portfolio number.
CSV/SWIFT Order Routing
The CSV/SWIFT Order Routing is used to exchange trading messages with UBS using the SOAP interface of true-Broker.
CSV/SWIFT Order Routing Adapter
Use the CSV/SWIFT Order Routing Adapter to configure your connection.
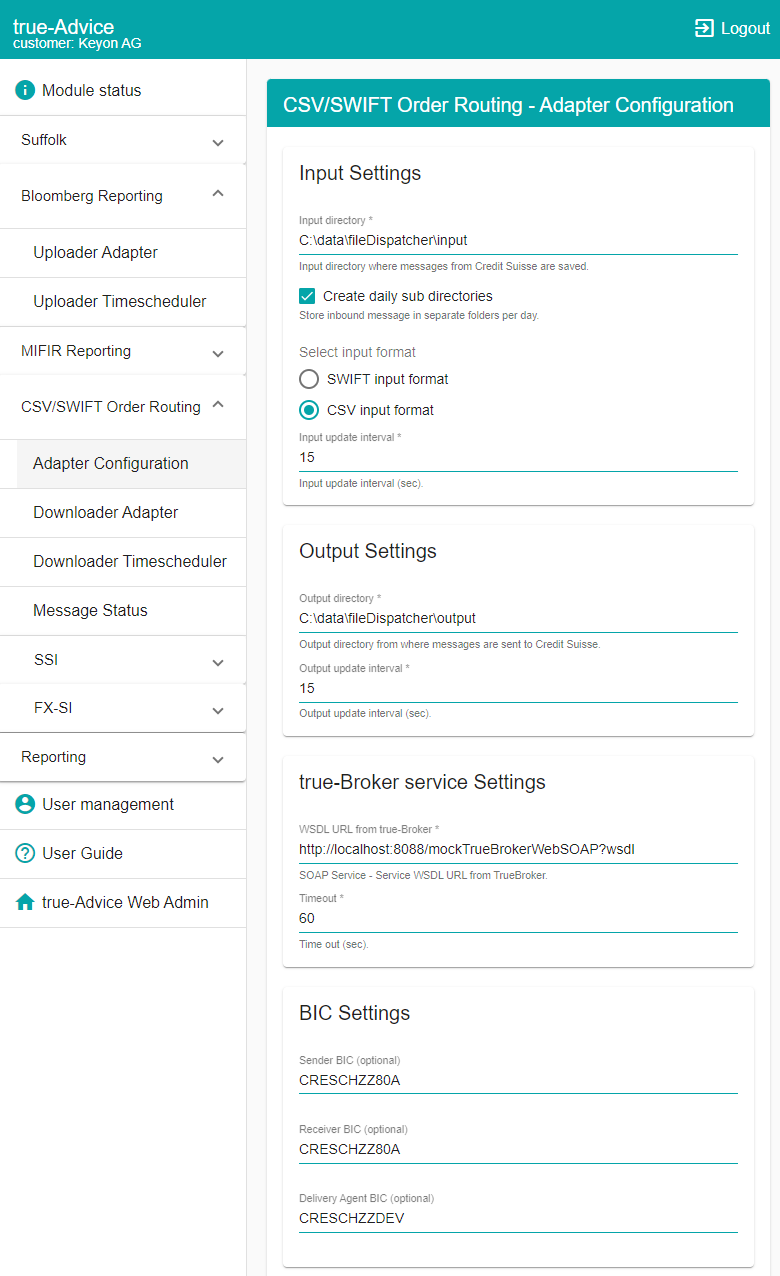
| Setting | Description | Default |
|---|---|---|
| Input directory | Defines the directory where the received files are stored | - |
| Create daily sub directories | If set, Order Routing creates a daily sub directory in the input directory | False |
| SWIFT input format | If set, the received messages are stored in SWIFT format as txt files in the input directory | SWIFT |
| CSV input format | If set, the received messages are converted into CSV and then stored as files in the input directory | SWIFT |
| Input update interval | Period in which Order Routing checks for new messages in Seconds | 15 |
| Output directory | Defines the directory where the files, which are to be sent, are stored | - |
| Output update interval | Period in which Order Routing checks for new files in Seconds | 15 |
| WSDL URL from true-Broker | URL of the true-Broker over which the messages are sent to and received from UBS | - |
| Timeout | Timeout after which the receive method is stopped | 60 |
| Sender BIC | Sender BIC which is used in SWIFT messages | - |
| Receiver BIC | Receiver BIC which is used in SWIFT messages | CRESCHZZ80A |
| Delivery Agent BIC | Delivery Agent BIC which is used in SWIFT messages for FX Settlement instructions | - |
Use the following syntax for all configured directories.
If you want to store the messages into a local directory:
/directory/[subdirectory/]
In case of a network directory use the following syntax:
You can optionally copy the URL of your network directory from your explorer:
Do not use mapped network drives. The Tomcat Apache server is using the System account to run and does not have access to mapped network drives.
Please define the domain, username and password to access the network directory.
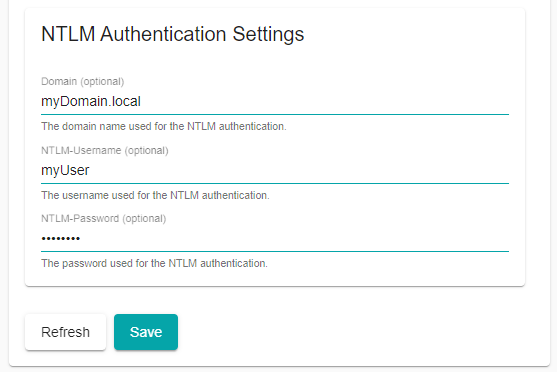
Press the Save button to save your changes.
Send messages
To send SWIFT messages, simply put them as text files into the configured output directory.
To send orders using a CSV file, put the CSV with below described format into the output directory.
Order CSV format
The CSV file must contain the header below:
MT502
V_SR15_1.0.0
ID;SenderBIC;ISIN;BuySell;Quantity;QuantityTypeCode;InstrumentType;OrderType;Limit;Trigger;Validity;ValidUntil;Exchange;Currency;PartyType;Party;PhoneOrder;eTicketNr;Narrative;CashAccount;SafekeepingAccount
The columns need to be divided by a semicolon.
The screenshot below does not contain the complete header, due to the limited space.

| Column | Description | Mandatory |
|---|---|---|
| ID | Numeric ID of the order, needs to be unique per day. With a maximal length of 3 | Yes |
| SenderBIC | BIC of the sender as BIC11 e.g. CRESCHZZ80A | Yes |
| ISIN | ISIN of the instrument | Yes |
| BuySell | BUYI SELL SUBS REDM | Yes |
| Quantity | Quantity of order (Numeric value) | Yes |
| QuantityTypeCode | Amount FaceAmount UNIT | Yes |
| InstrumentType | EQU BON | Yes |
| OrderType | Limit Market Stop Stop_Limit | Yes |
| Limit | Limit in case of a Limit order (Numeric value) | No |
| Trigger | Trigger in case of Stop order (Numeric value) | No |
| Validity | Day_Order Good_Till_Date (For CH booked accounts) Good_Till_Canceled Expire_On (For UK Booked accounts) | Yes |
| ValidUntil | Valid until date in case of a valid until order (dd.mm.yyyy) | No |
| Exchange | Exchange to execute the order | No |
| Currency | ISO-Currency | Yes |
| PartyType | BRCR (Broker of Credit) Party that receives the trade credit BUYR (Buyer) Party that receives the financial instrument. CLBR (Clearing Broker) Party that settles the trade on behalf of the executing broker. INBR (Introducing Broker) Party that has the closest association with the investor. INVE (Investor) Default, use sender BIC Instructing party, either an individual or organization, whose assets are being invested. RQBR (Requested Broker) In a directed order (:22F::TTCO//DIOR), broker with which the Receiver of the message is requested to execute the order. SELL(Seller) Party that delivers the financial instrument. STBR (Step-In Broker) Party to whom the investor directs the credit for executing the trade. | Yes |
| Party | BIC of the party as BIC11 e.g. CRESCHZZ80A | Yes |
| PhoneOrder | TRUE FALSE | Yes Default false |
| eTicketNr | eTicket Number in case of a phone order | No |
| Narrative | Narrative of max. 35 characters. No special characters allowed | No |
| CashAccount | Cash Account (Format: 1234-1234567-12-123) | No |
| SafekeepingAccount | Safekeeping account (Format: 1234-1234567-12-123) | Yes |
Message History – Message Status
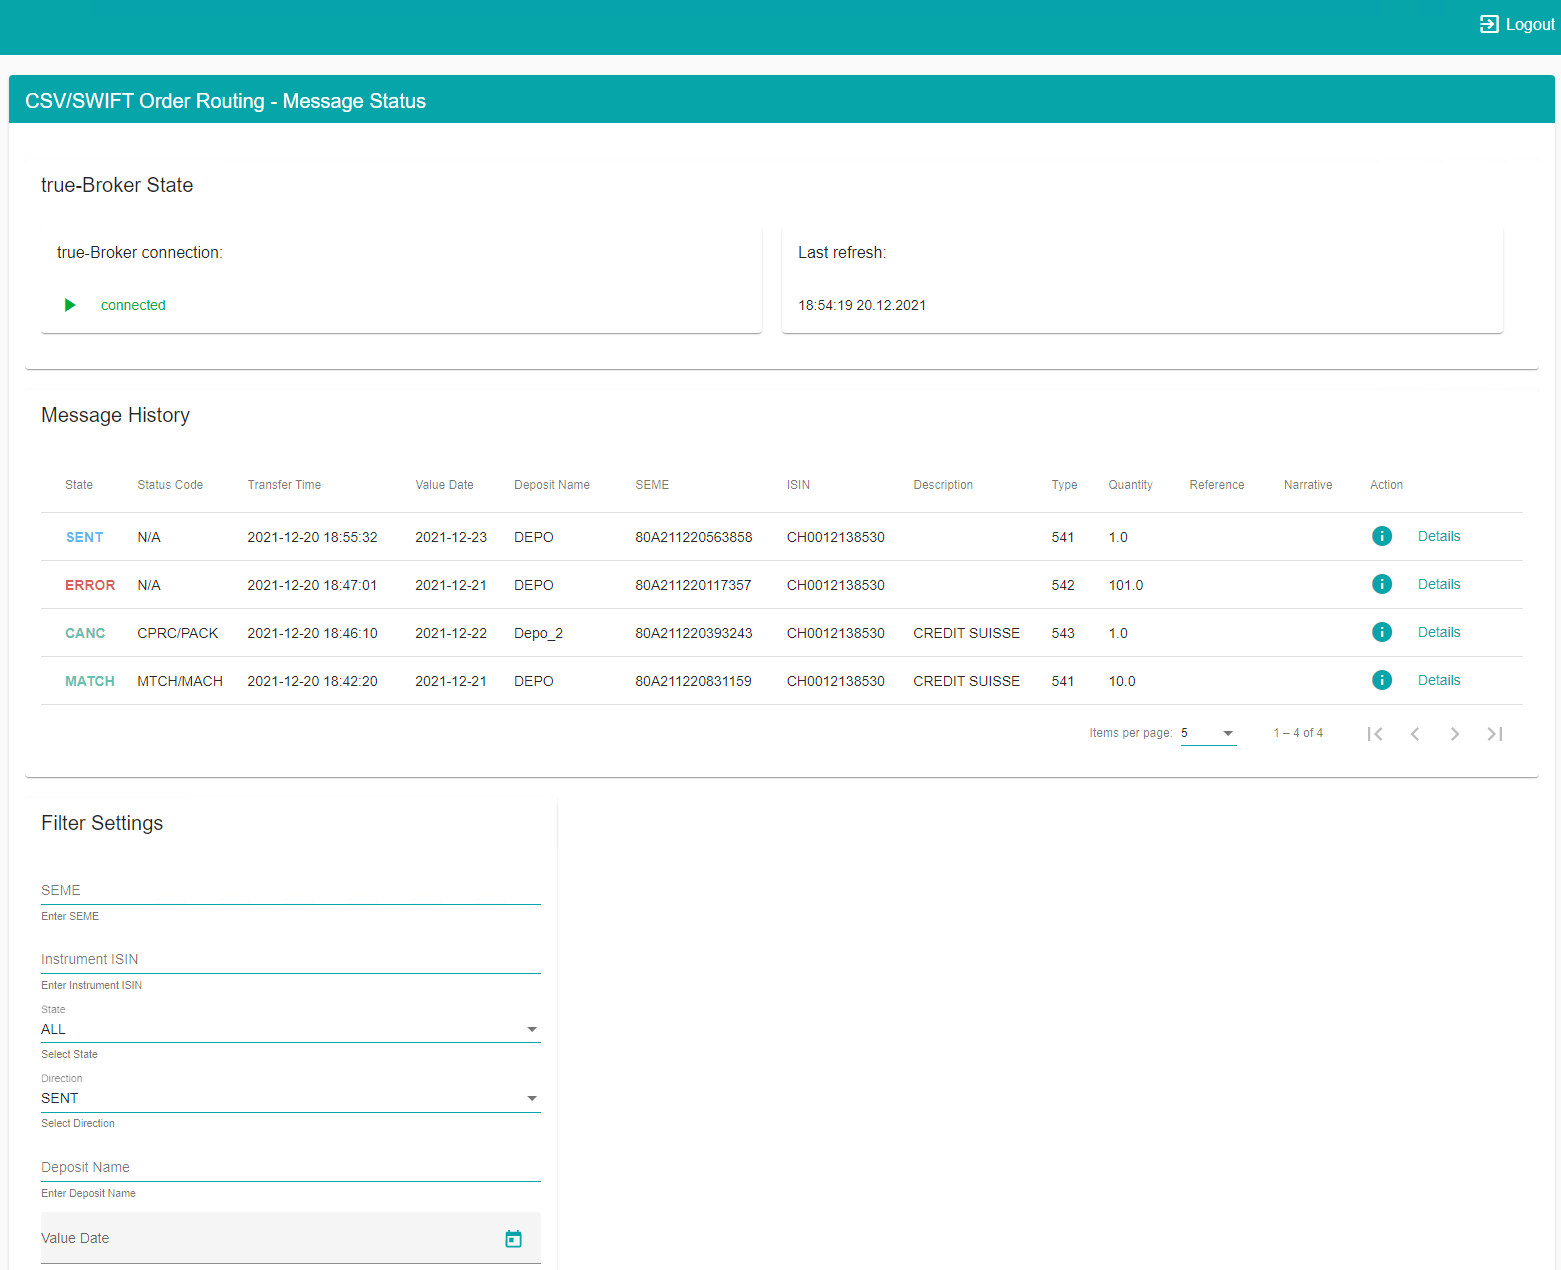
The Message History page is used to monitor all sent and received messages.
It is in the responsibility of the customer to check – at least in this page – that the message was transferred successfully and has been accepted by UBS with a respective response.
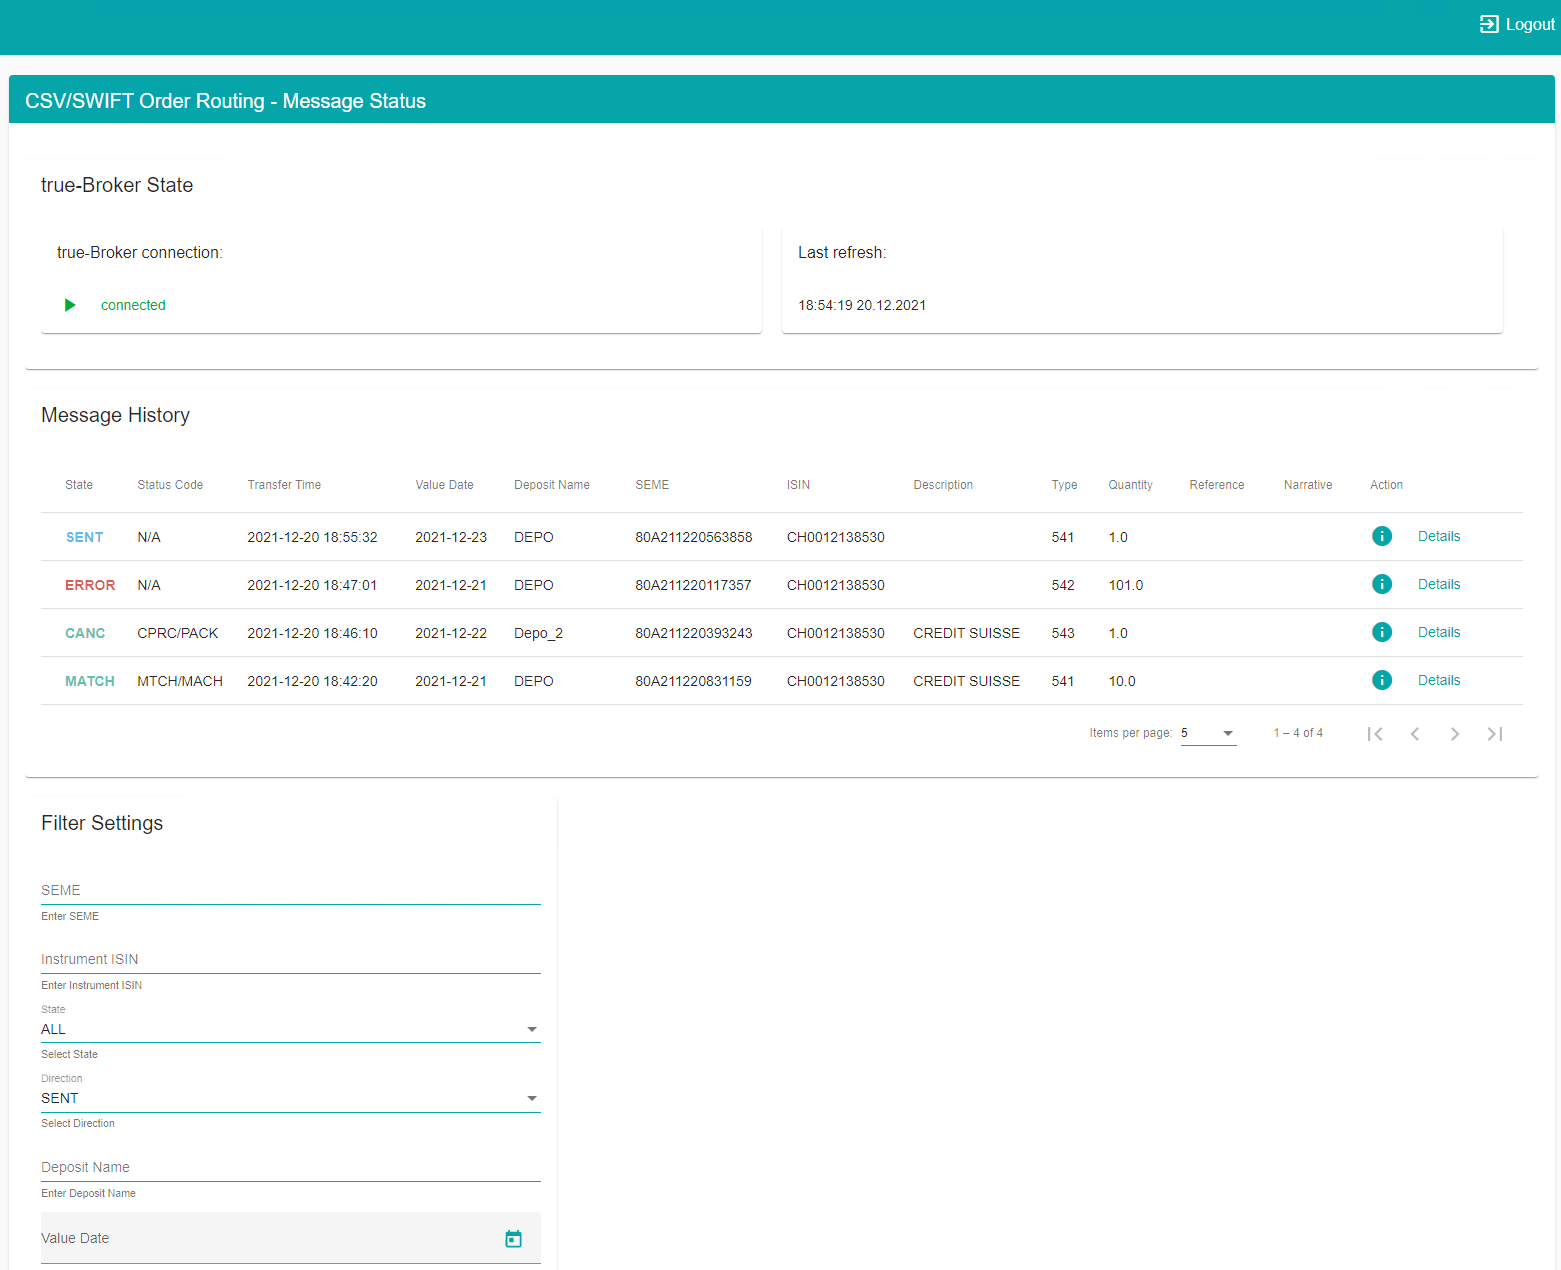
The history is automatically updated every 30 seconds. The TrueBoker Connection shows connected, if CSV/SWIFT Order Routing is running and able to reach a working true-Broker. The messages can be filtered by:
- SEME
- ISIN
- State
- Direction
- Deposit Name
- Value Date
- Date From
- Date To
Message States
The messages can be in the following states:
| State | Description |
|---|---|
| Sent | Message was successfully sent to UBS. This state only means that the technical transfer was successful. It does not necessarily mean that UBS has accepted the message. |
| Error | Message could not be sent |
| Accepted | Message was accepted by UBS, based on the received response |
| Rejected | Message was rejected by UBS, based on the received response |
| Cancellation sent | A cancellation was sent for this message to UBS |
| Cancelled | Cancellation of this message was accepted by UBS, based on the received response |
| Received | Message was received from UBS |
| Cancellation pending | Cancellation of this settlement message is pending by UBS |
| Matched | Settlement message has been matched |
| Unmatched | Settlement message is unmatched on the market |
| Pending | Settlement message is in a pending state, still possible to settle at instructed date |
| Failed | Settlement message has failed, not possible to settle at instructed date |
| Denied | Instruction was denied by UBS |
| Not accepted | Instruction was not accepted by UBS |
| Repair | Settlement message is accepted, but in repair |
| Overdue | Settlement message is overdue |
| Other | All Other states, based on the response by UBS |
Message Details
By clicking on the link of the row of the message, the details of the message can be shown
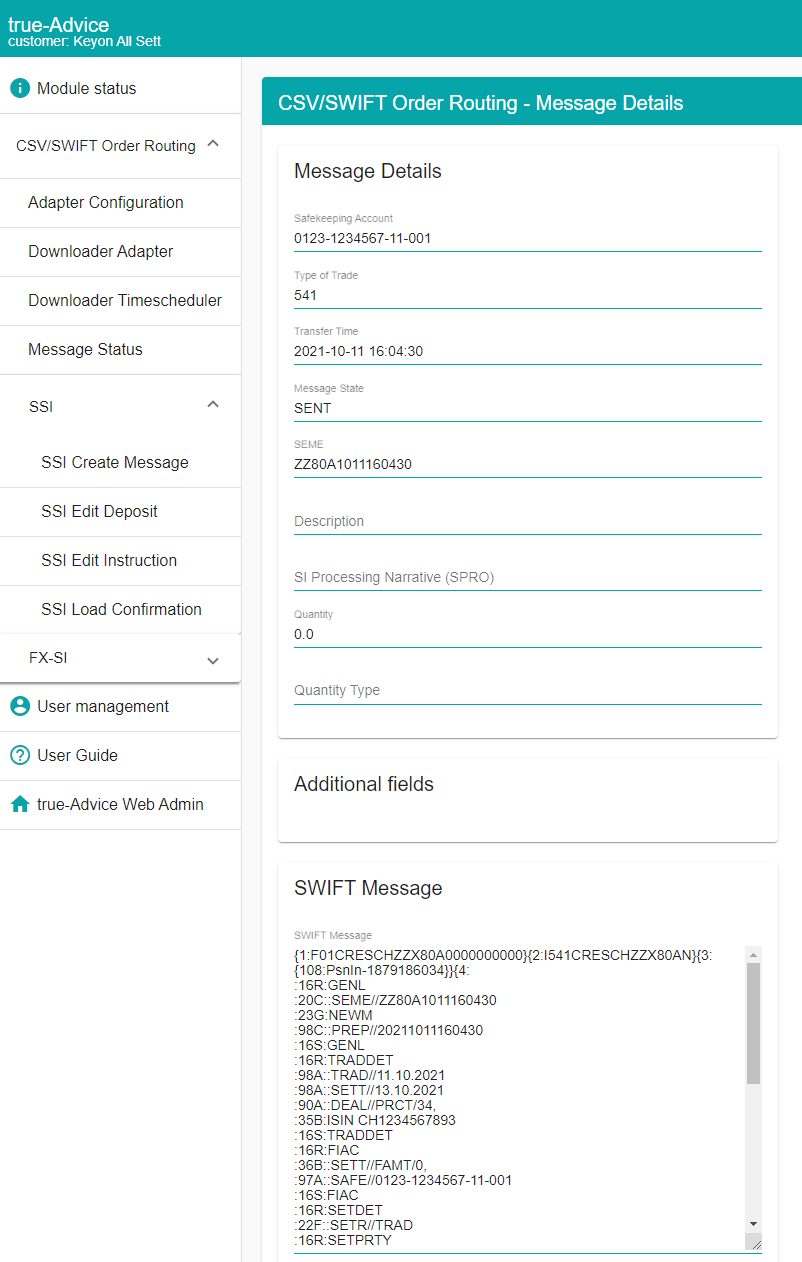
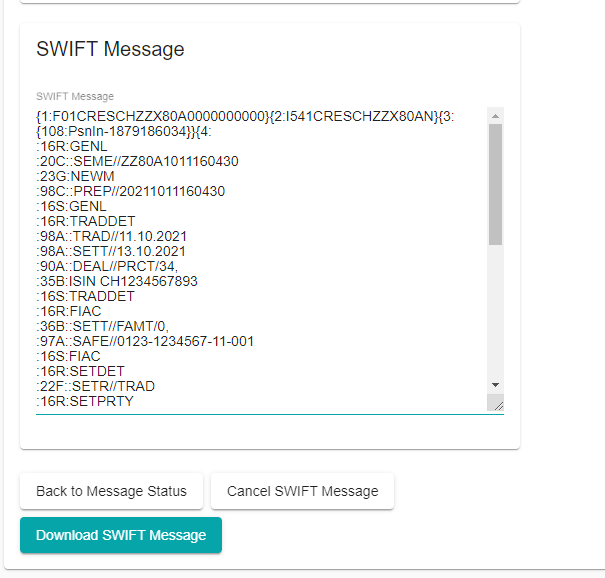
Download message
Press on the Download SWIFT Message button to download the current message.
Cancel message
Press on the Cancel SWIFT Message button to send a cancellation for the current message to UBS.
SSI Creator
The SSI Creator module is based on the CSV/SWIFT Order Routing and is used to create and send settlement instructions to UBS.
Configuration
For a detailed description of the CSV/SWIFT Order Routing module, please refer to chapter 12. There are no options specific to the SSI Creator.
Deposits
To use the SSI Creator, the used deposits need to be configured.
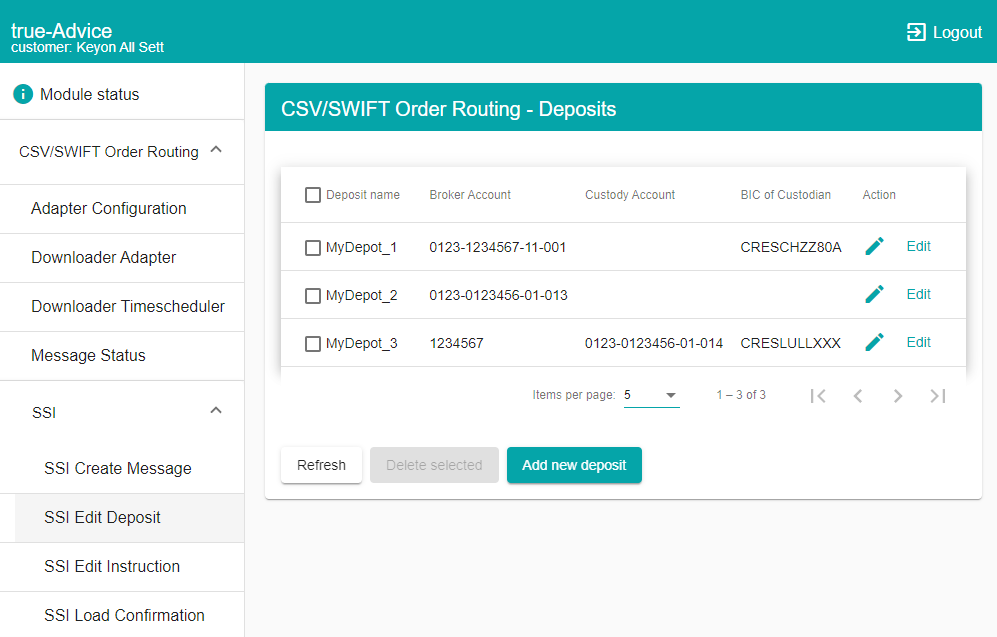
The deposits can be managed by Edit or by Add new deposit.
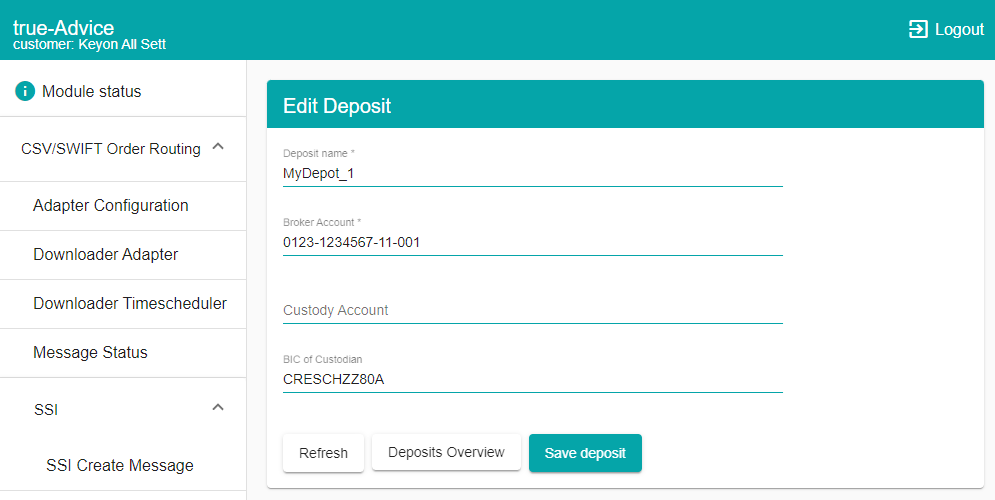
To add a new deposit, enter the Deposit name (mandatory) and the Broker Account Number (mandatory) and press the Save deposit button. If a Custodian Account or Receiver BIC is added next to a deposit, the application will use the Custodian Account or respectively the Receiver BIC inside the message.
To edit an existing deposit, press on the Edit link, enter the changes and press on the Save deposit button.
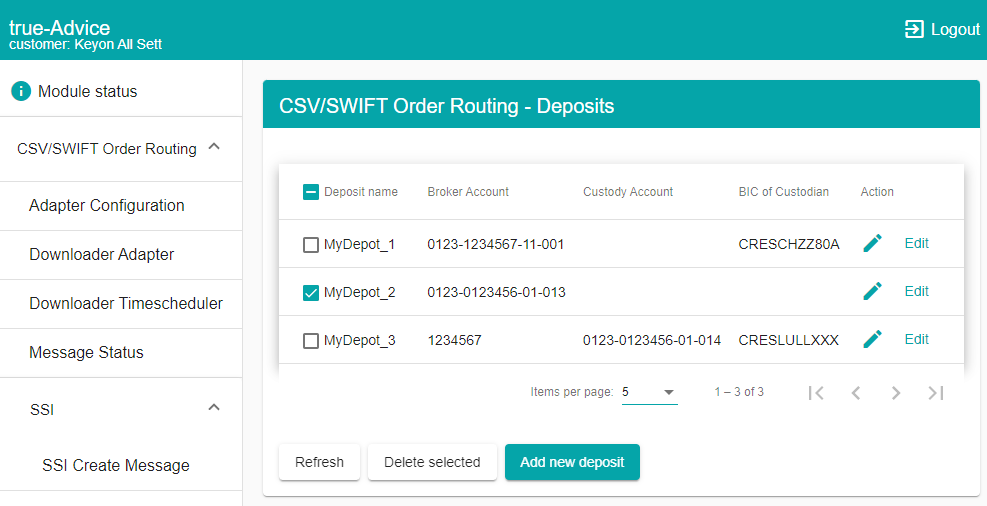
To delete a deposit, select the entry and press on Delete selected.
Instructions
The SSI Creator uses predefined Instructions based on the chosen broker and market.
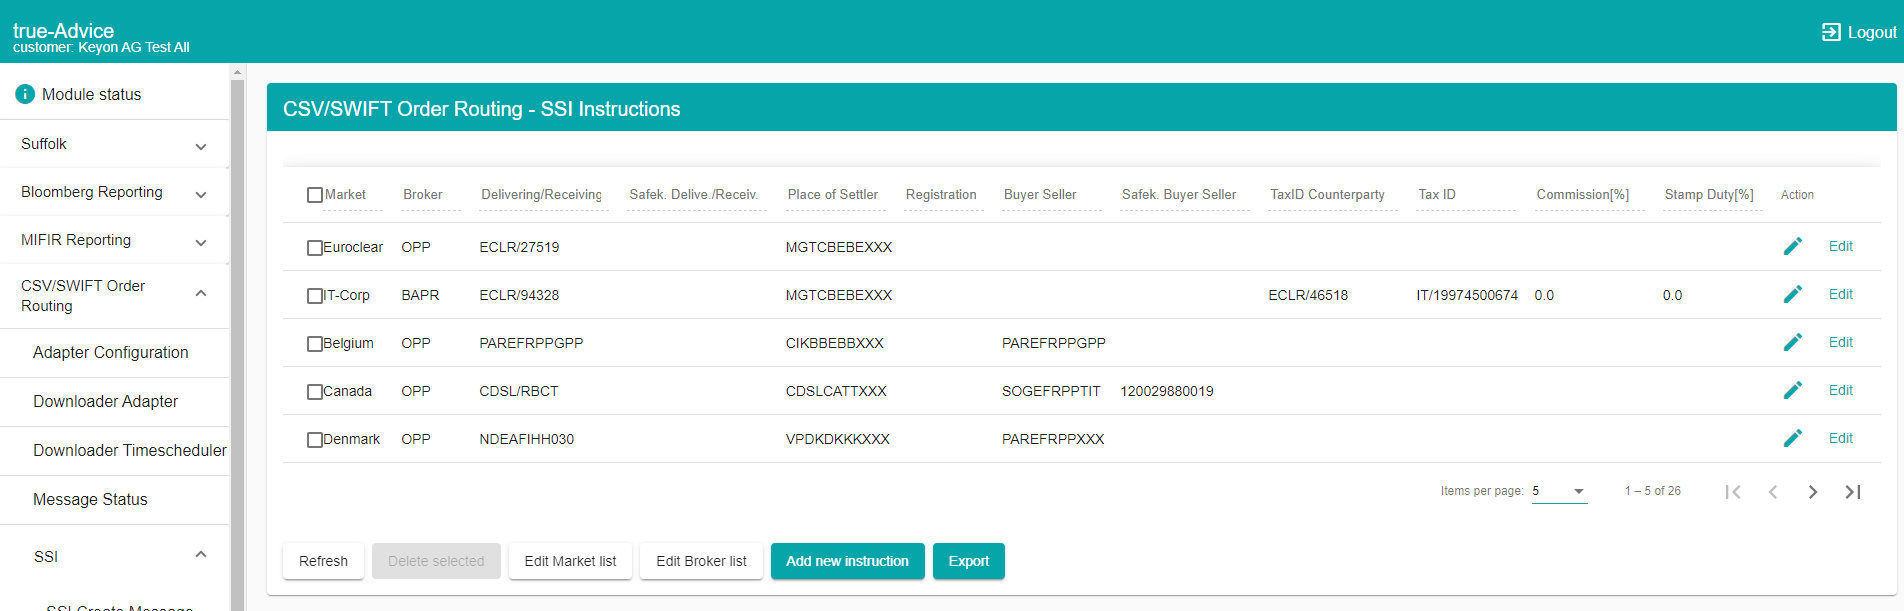
The settlement instructions can be managed on the Instructions page.
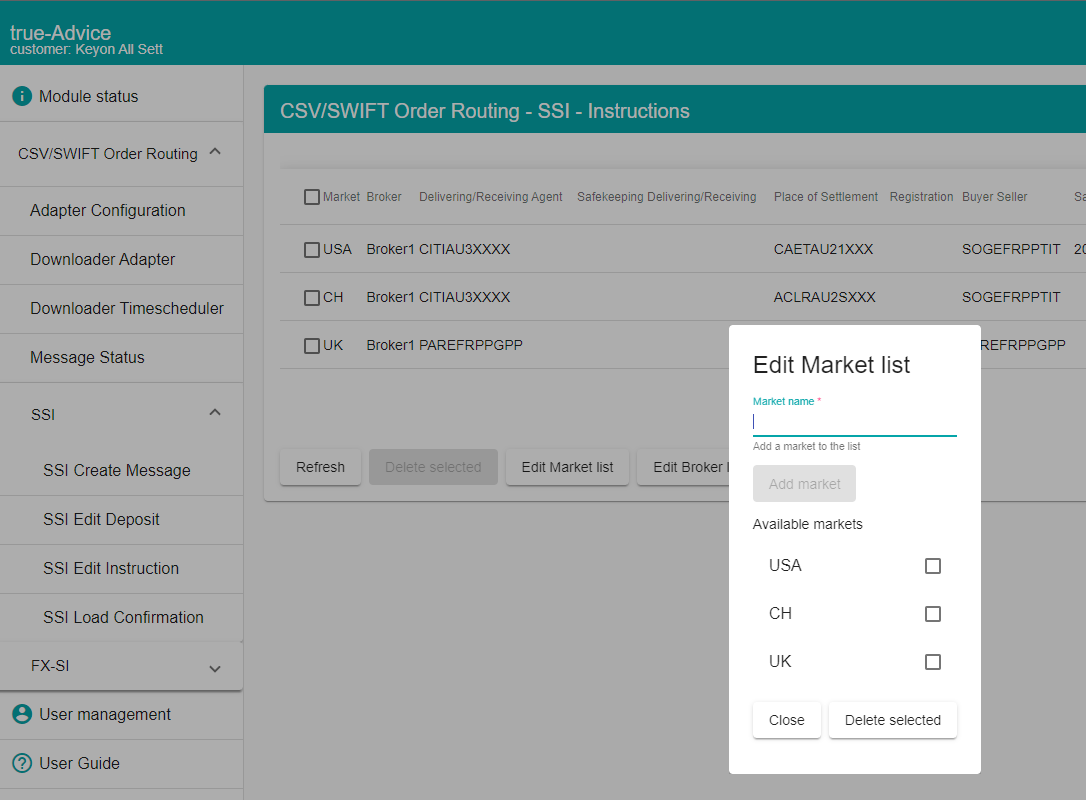
To add a new market, click on the Edit Market list button, enter the name of the market and press the Add market button.
To delete a market, click the Edit Market list button, select the name of the market and press the Delete selected button.
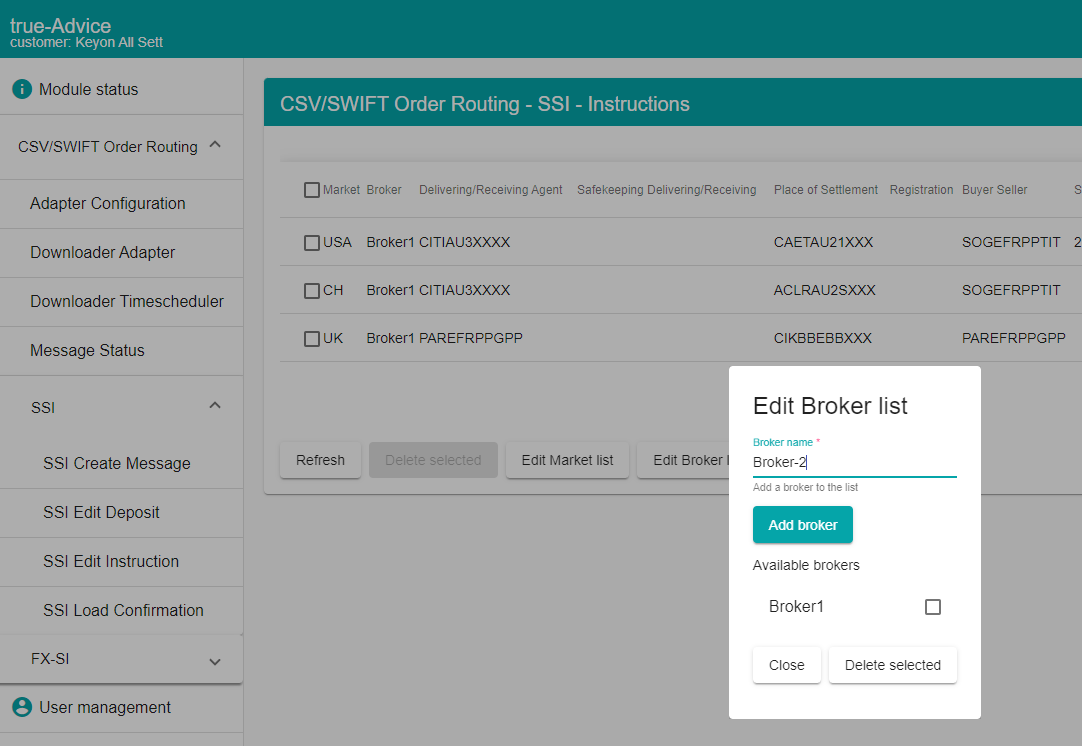
To add a new broker, click on the Edit Broker list button, enter the name of the broker and press the Add broker button.
To delete a broker, click on the Edit Broker list button, select the name of the broker and press the Delete selected button.
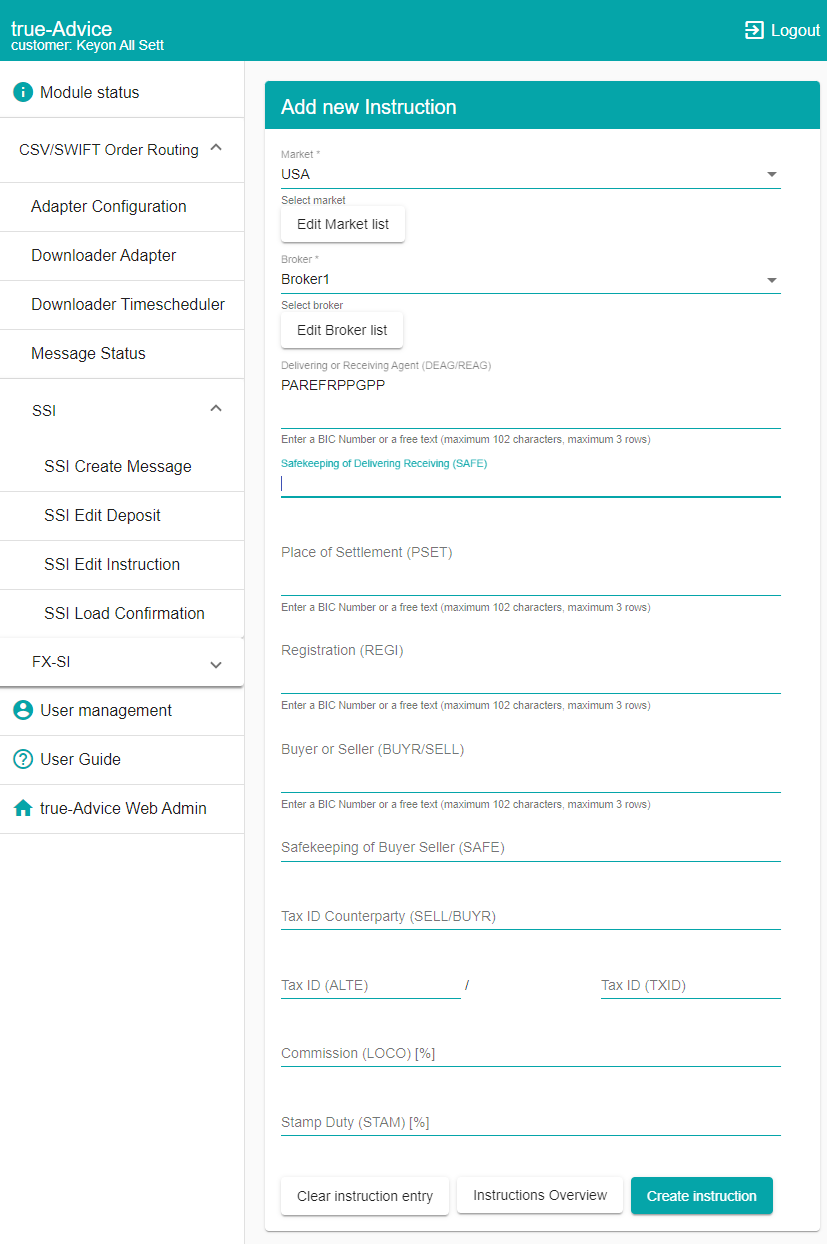
To add a new Instruction, click on the Add new instruction button, enter the required values and press the Create instruction button.
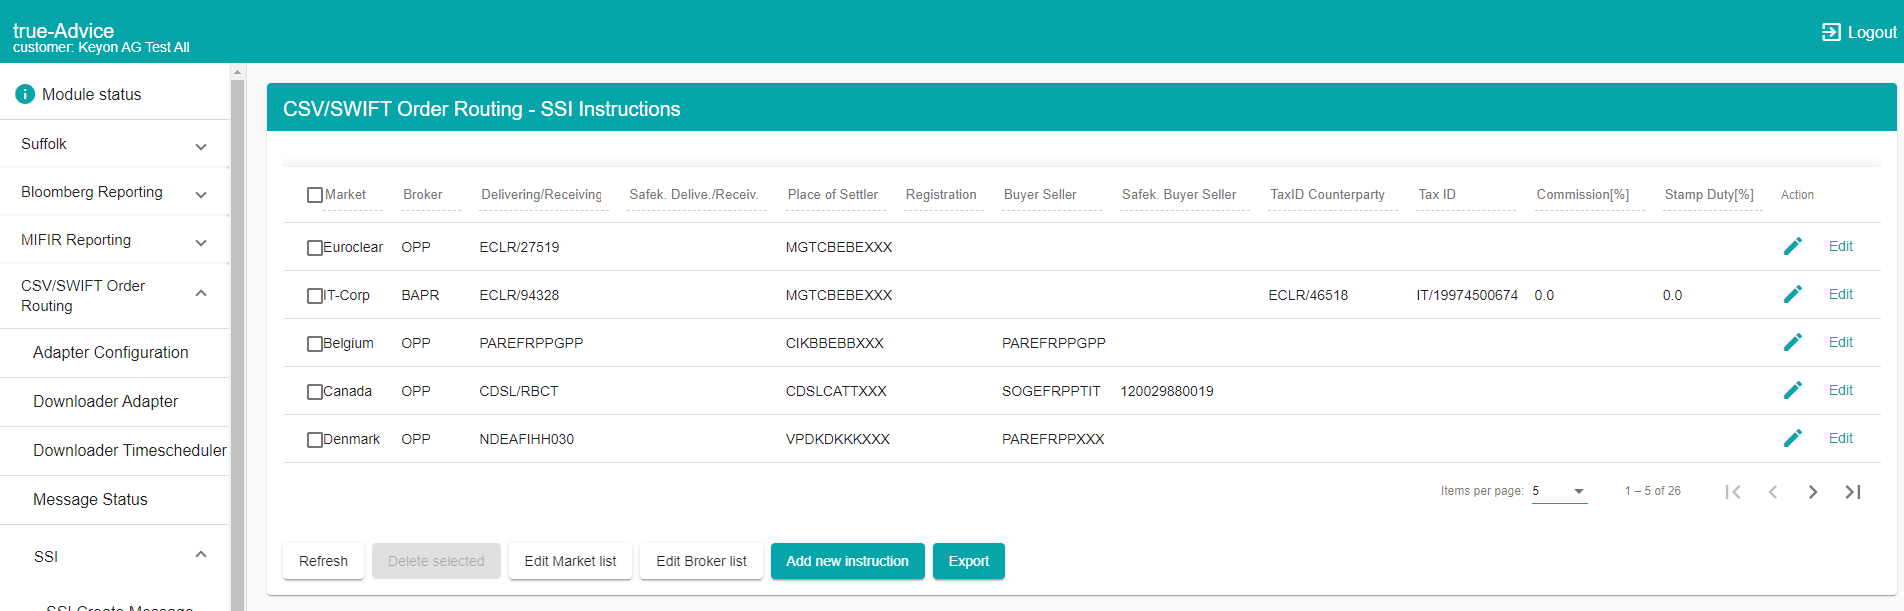
To delete an instruction, select the required instruction and press the Delete selected button.
To export the complete list of instructions, click on the Export button.
To filter the list, click on the header column and enter the searched string
Inside the Load Settlement Instructions box the instructions can be loaded through a signed xml file provided by SITS with the settlement instructions compiled by the customer.
SSI Creation
To send an SSI message to UBS open die SSI Create Message page. It will lead you through multiple steps in which you can enter the trade details. In the last step you can review the values and enter the required values and press on Submit to send the instructions to UBS. See below table for a detailed description.
It is in the responsibility of the customer to check – at least in the history page (chapter 12.3) – that the messages were transferred successfully and have been accepted by UBS with a respective response.
| Field | Description |
|---|---|
| Deposit Name | Filled automatically, based on the chosen account |
| Broker Account | The safekeeping account, list based on the configured accounts. See chapter 13.2 |
| Type of trade | Receive Against Payment (MT541) Deliver Against Payment (MT543) |
| Trade Date | Date of trade |
| Settlement Date | Date of settlement |
| Instrument ISIN | ISIN of the instrument |
| Equity (UNIT) | Units in case of equity |
| Bonds (FAMT) | Face amount (FAMT) in case of bonds |
| Transaction currency | Currency of the transaction |
| Broker | Chose broker based on the configured ones. See chapter 13.3 |
| Market | Chose market based on the configured ones. See chapter 13.3 |
| Price | Price of the trade |
| Amount | Filled automatically, based on the other values |
| Commission 1 | Local commission (LOCO), calculated automatically if set in the instructions |
| Fees | Local fees (CHAR) |
| Stamp Duty | Stamp duty (STAM), calculated automatically if set in the instructions |
| Stoch Exchange Tax | Stock exchange tax (STEX) |
| Executing Broker’s Amount | Executing broker’s amount (EXEC) |
| Accrued Interest | Accrued interest (ACRU) for bonds only |
| Other commissions | Other commissions can be added by using the dropdown menu and the Add button. Available options are: Country, National, Federal Tax (COUN) Local Tax Country Specific (LADT) Payment Levy Tax (LEVY) Local Tax (LOCL) Other Amount (OTHR) Regulatory among (REGF) Research Fee (RSCH) Shipping Among (SHIP) Transfer Tax (TRAN) Transaction Tax (TRAX) Value-Added Tax (VATA) Withholding Tax (WITH) |
| Net Amount | Filled automatically based on the other values |
| Settlement Indicator | For a detailed description, kindly refer to the SWIFT standard or respective market guide. Possible options are:TRAD RODE OWNE SBRE OWNI SECB BYIY SECL CLAI SWIF NETT SWIT PLAC COV PORT EFTF REAL ISSU IBRC/OAUX |
| Stamp Duty Indicator | For a detailed description, kindly refer to the SWIFT standard or respective market guide. Possible options are: BENE/NBEN BENE/YBEN REGT/YREG REGT/NREG STAM/CRST/IE1X STAM/CRST/IE8X STAM/CRST/GBPX STAM/CRST/GBTX STAM/CCAS/FUSD STAM/CCAS/HASD STAM/STRA/USTN SETR/SMPG/TRFD |
| Counterparty Settlement Agent | Filled automatically based on the other values |
| Counterparty | Filled automatically based on the other values |
| Place of Settlements | Filled automatically based on the other values |
| Counterparty Account | Filled automatically based on the other values |
| Place of Trade Code | For a detailed description, kindly refer to the SWIFT standard or respective market guide. Possible options are: EXCH OTCO |
| Place of Trade | Place of trade |
| SI Processing Narrative | Narrative |
Load Confirmation
The trade details can be uploaded through the SSI Load Confirmation page inside the tool. Only CSV file formats and MT515 SWIFT messages are supported. Once the trades have been uploaded, simply click on Instruct to load the Create Message page with the trade details.
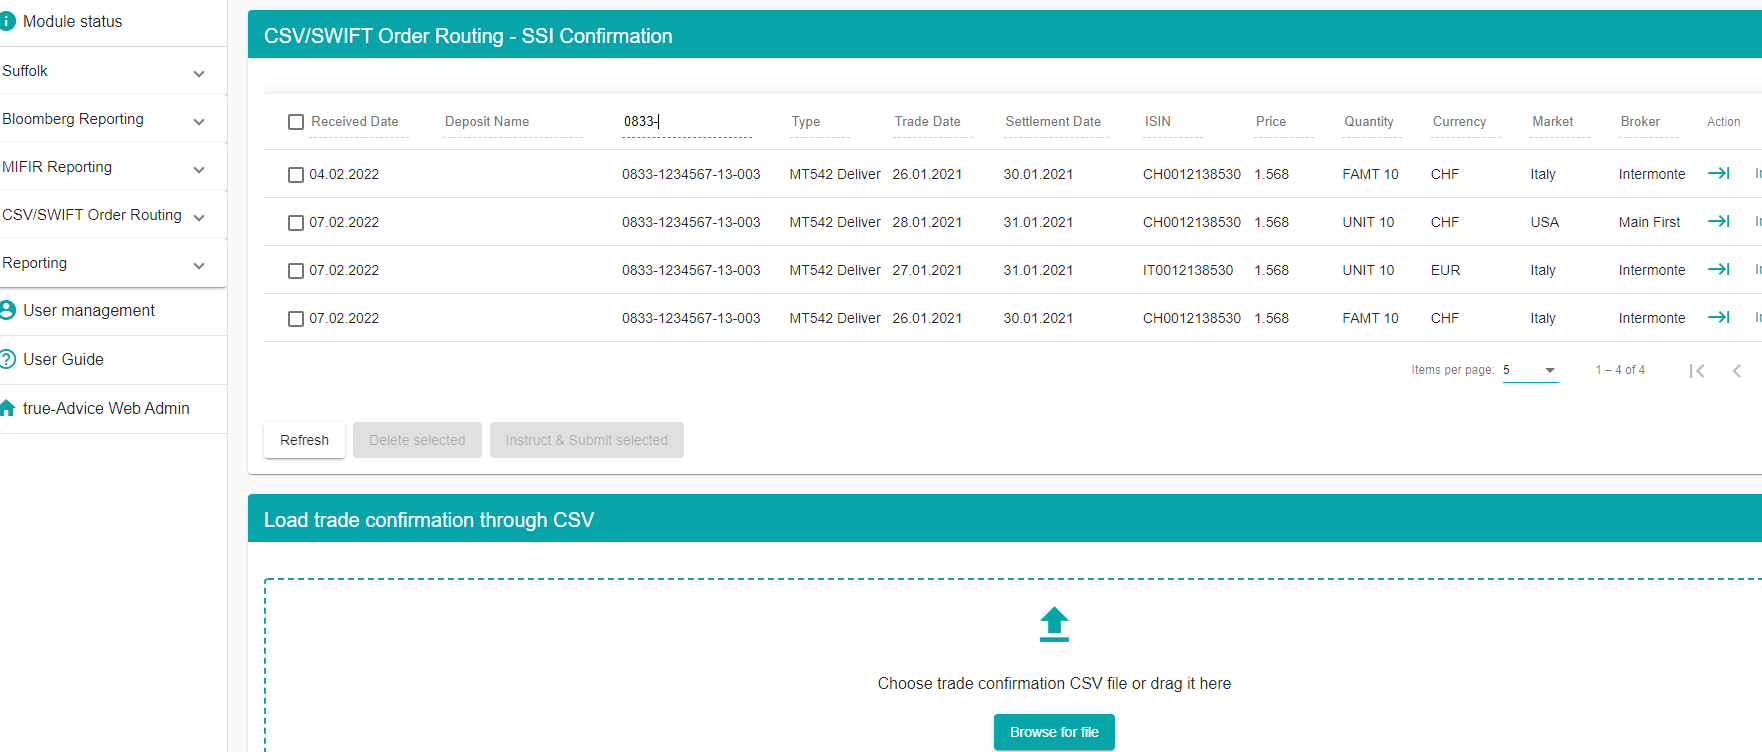
To directly instruct one or multiple trades, select the required trades and click on Instruct selected. For that to work, all details need to match, i.e., a matching market and broker needs to be configured, the loaded CSV needs to contain all details of the trade.
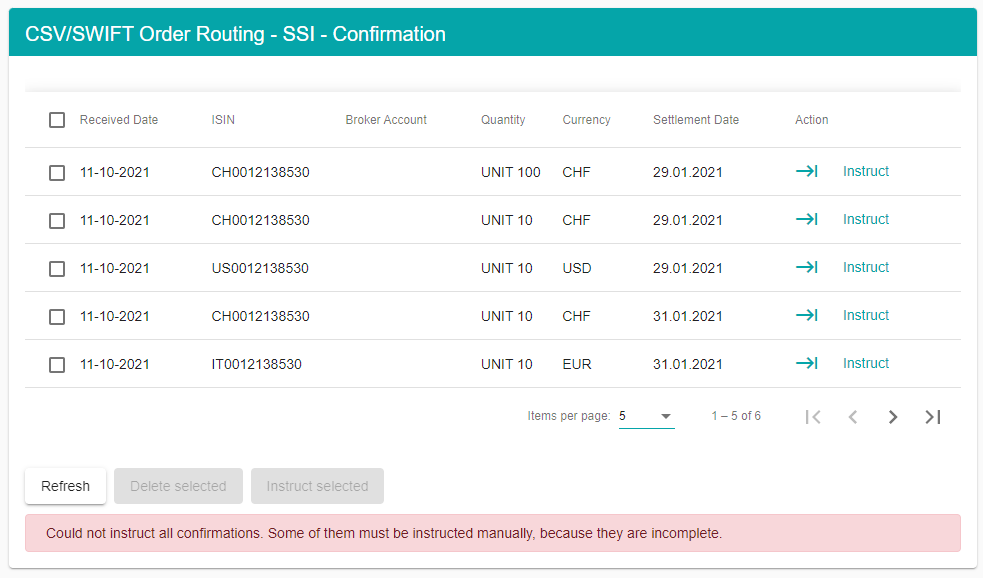
If some required values are missing, the trade will not be instructed. In that case the Instruct button can be used to amend the details and submit the instruction manually.
The SSI Confirmation routing module allows the table to be filtered using the searched text, inserted in the table header input fields. The Table will then filter the data based on a AND Algorithm, shown in the screenshot below.

CSV-File specification
Below a description of each column in the CSV can be found. Each column must be present, non-mandatory ones can be left empty (no whitespaces).
| Field | Description | Mandatory |
|---|---|---|
| Trade ID | Unique ID of the trade Alphanumeric max 40 characters | Yes |
| Trade Status | NEW – for a new trade CANCEL – for a cancellation In case of cancel, the “Trade ID” must be the unique ID of the original trade which is cancelled | Yes |
| Safekeeping Account | Account-Nr of Credit-Suisse; Or Broker-Account as configured in Deposits (See Chapter: 13.2) | Yes |
| Type of Trade | B or BL - For a Buy S or SL - For a Sell | Yes |
| Trade Date | In the format: DD.MM.YYYY | Yes |
| Settlement Date | In the format: DD.MM.YYYY | Yes |
| ISIN | ISIN of the instrument | Yes |
| Quantity | Number of shares or face amount | Yes |
| Bond | UNIT – for equities FAMT – for bonds | Yes |
| Currency | ISO-4217 code of the currency | Yes |
| Broker | Name of the broker Needs to map a broker configured in the instructions (See chapter: 13.3) | Yes |
| Market | Name of the market Needs to map a market configured in the instructions (See chapter: 13.3) | Yes |
| Price | Deal-Price | Yes |
| Amount | Deal-Amount (Price * Quantity) | Yes |
| Commission | Local Broker’s Commission | No |
| Stamp Duty | Stamp Duty | No |
| LEVY | Payment Levy Tax | No |
| LOCL | Local Tax | No |
| TRAX | Transaction Tax | No |
| ACRU | Accrued Interest Amount | No |
| Place of Trade Code | EXCH – Stock exchange OTCO – Over the Counter | No |
| Place of Trade | MIC code of exchange (e.g. XSWX) | No |
| Stamp Duty Indicator | Stamp Duty Indicator | No |
| Narrative | Narrative for CS Trading desk. Will force manual processing of the message. Therefore, best to leave empty. | No |
Message History – Message Status
Sent settlement instructions and received responses can be monitored in the History page of the CSV/SWIFT Order Routing module. For a detailed description please refer to chapter 12.3.